Apple Pay Payment Request (UI)
Prerequisite:
1) Register for an Apple Merchant ID. Reference
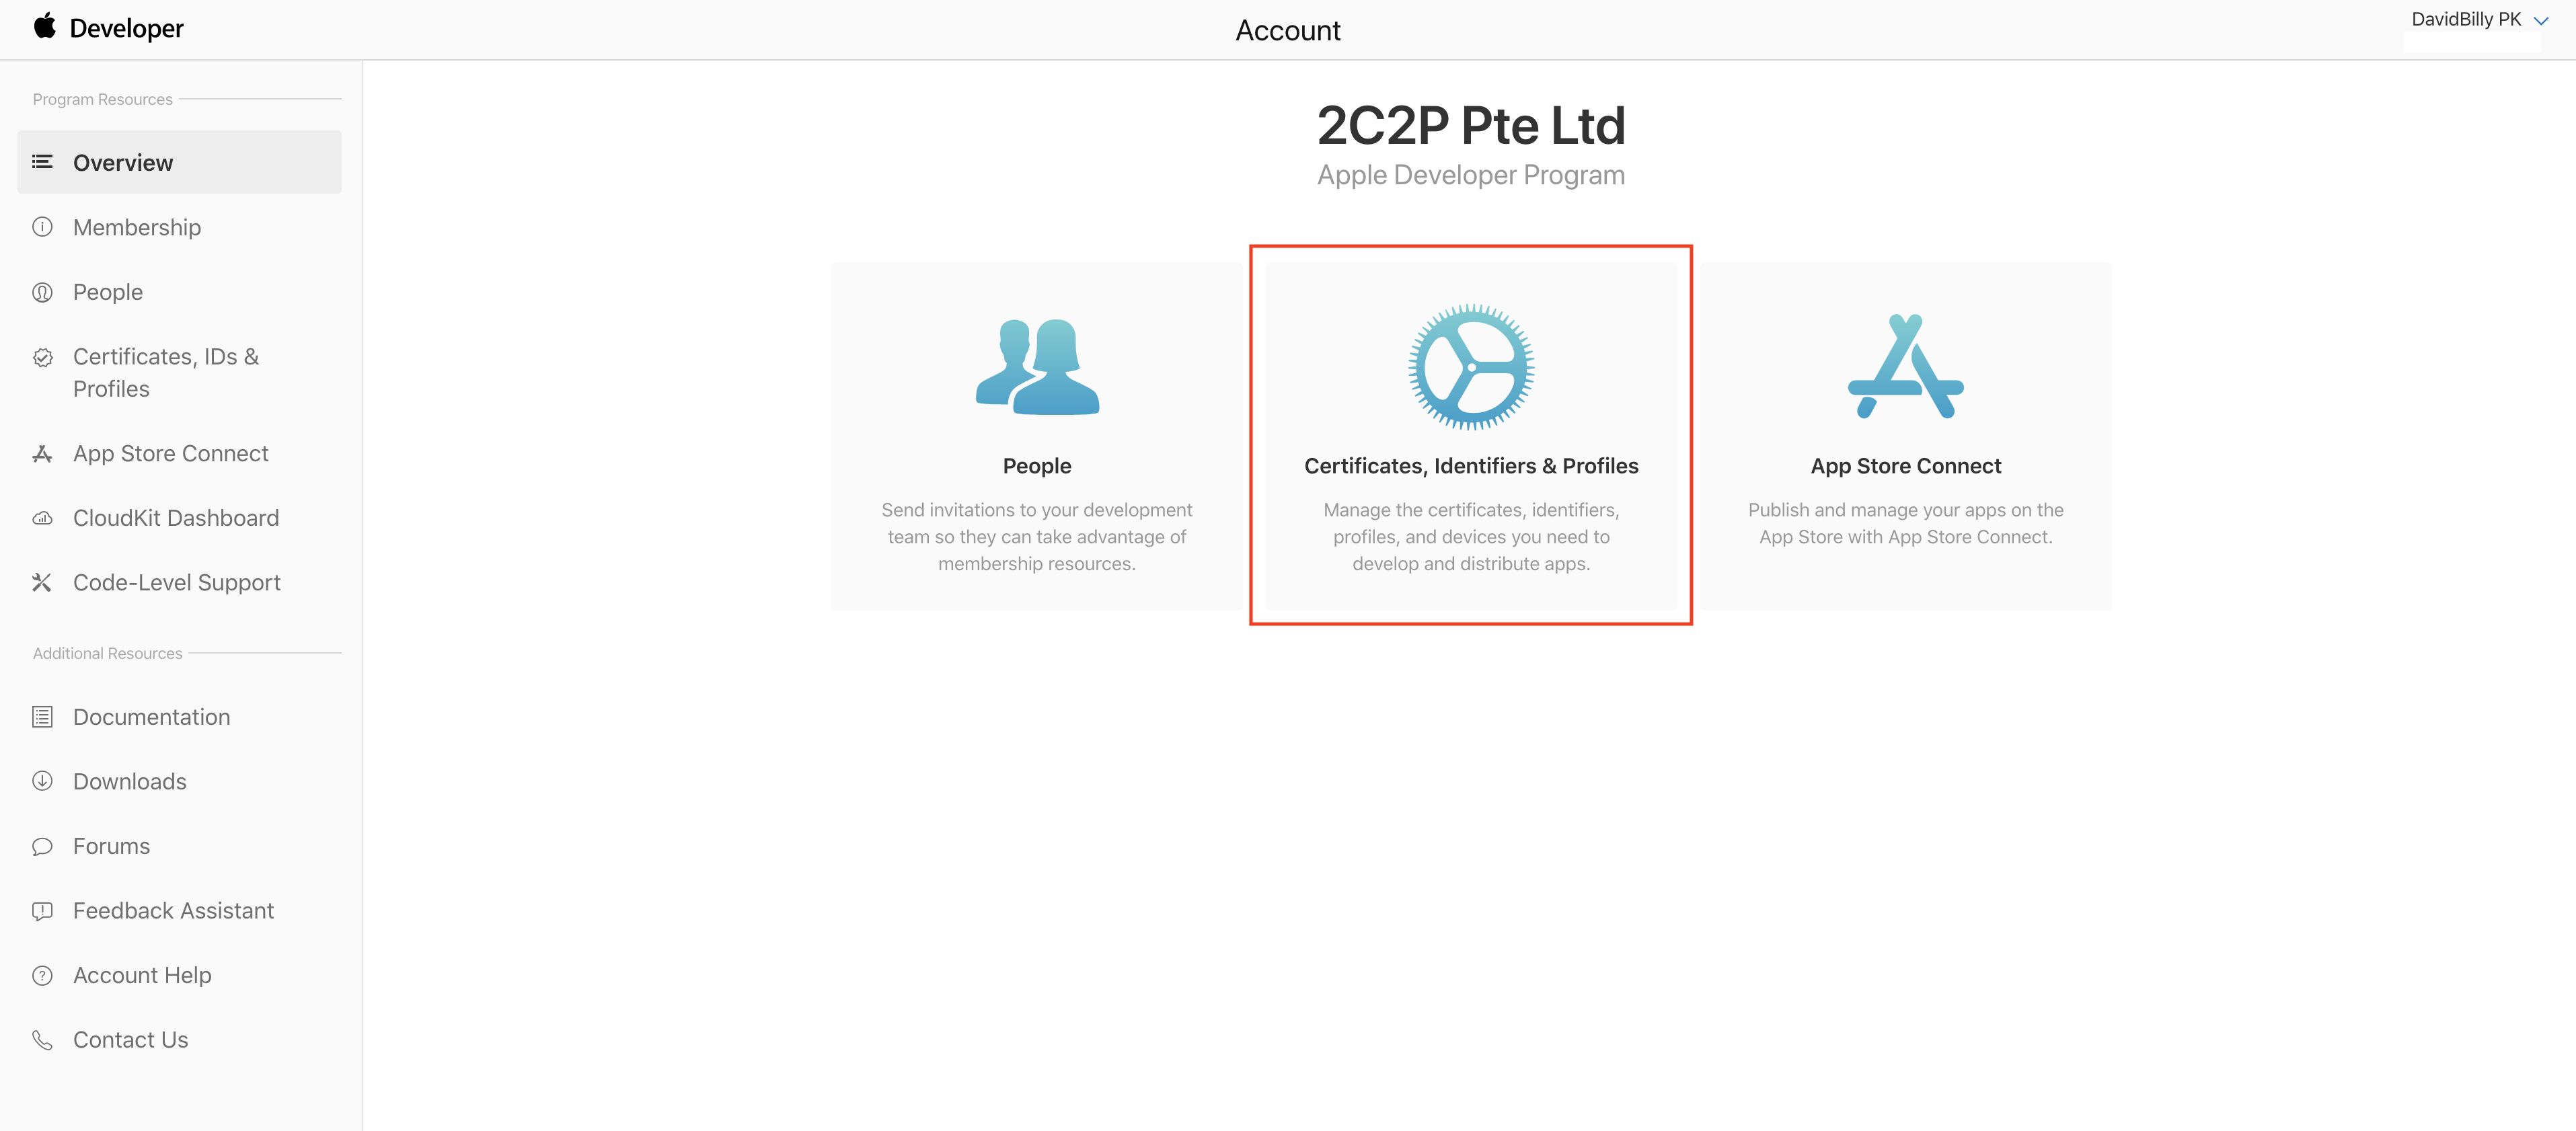
Step 1: Click on Certificates, Identifiers & Profiles.
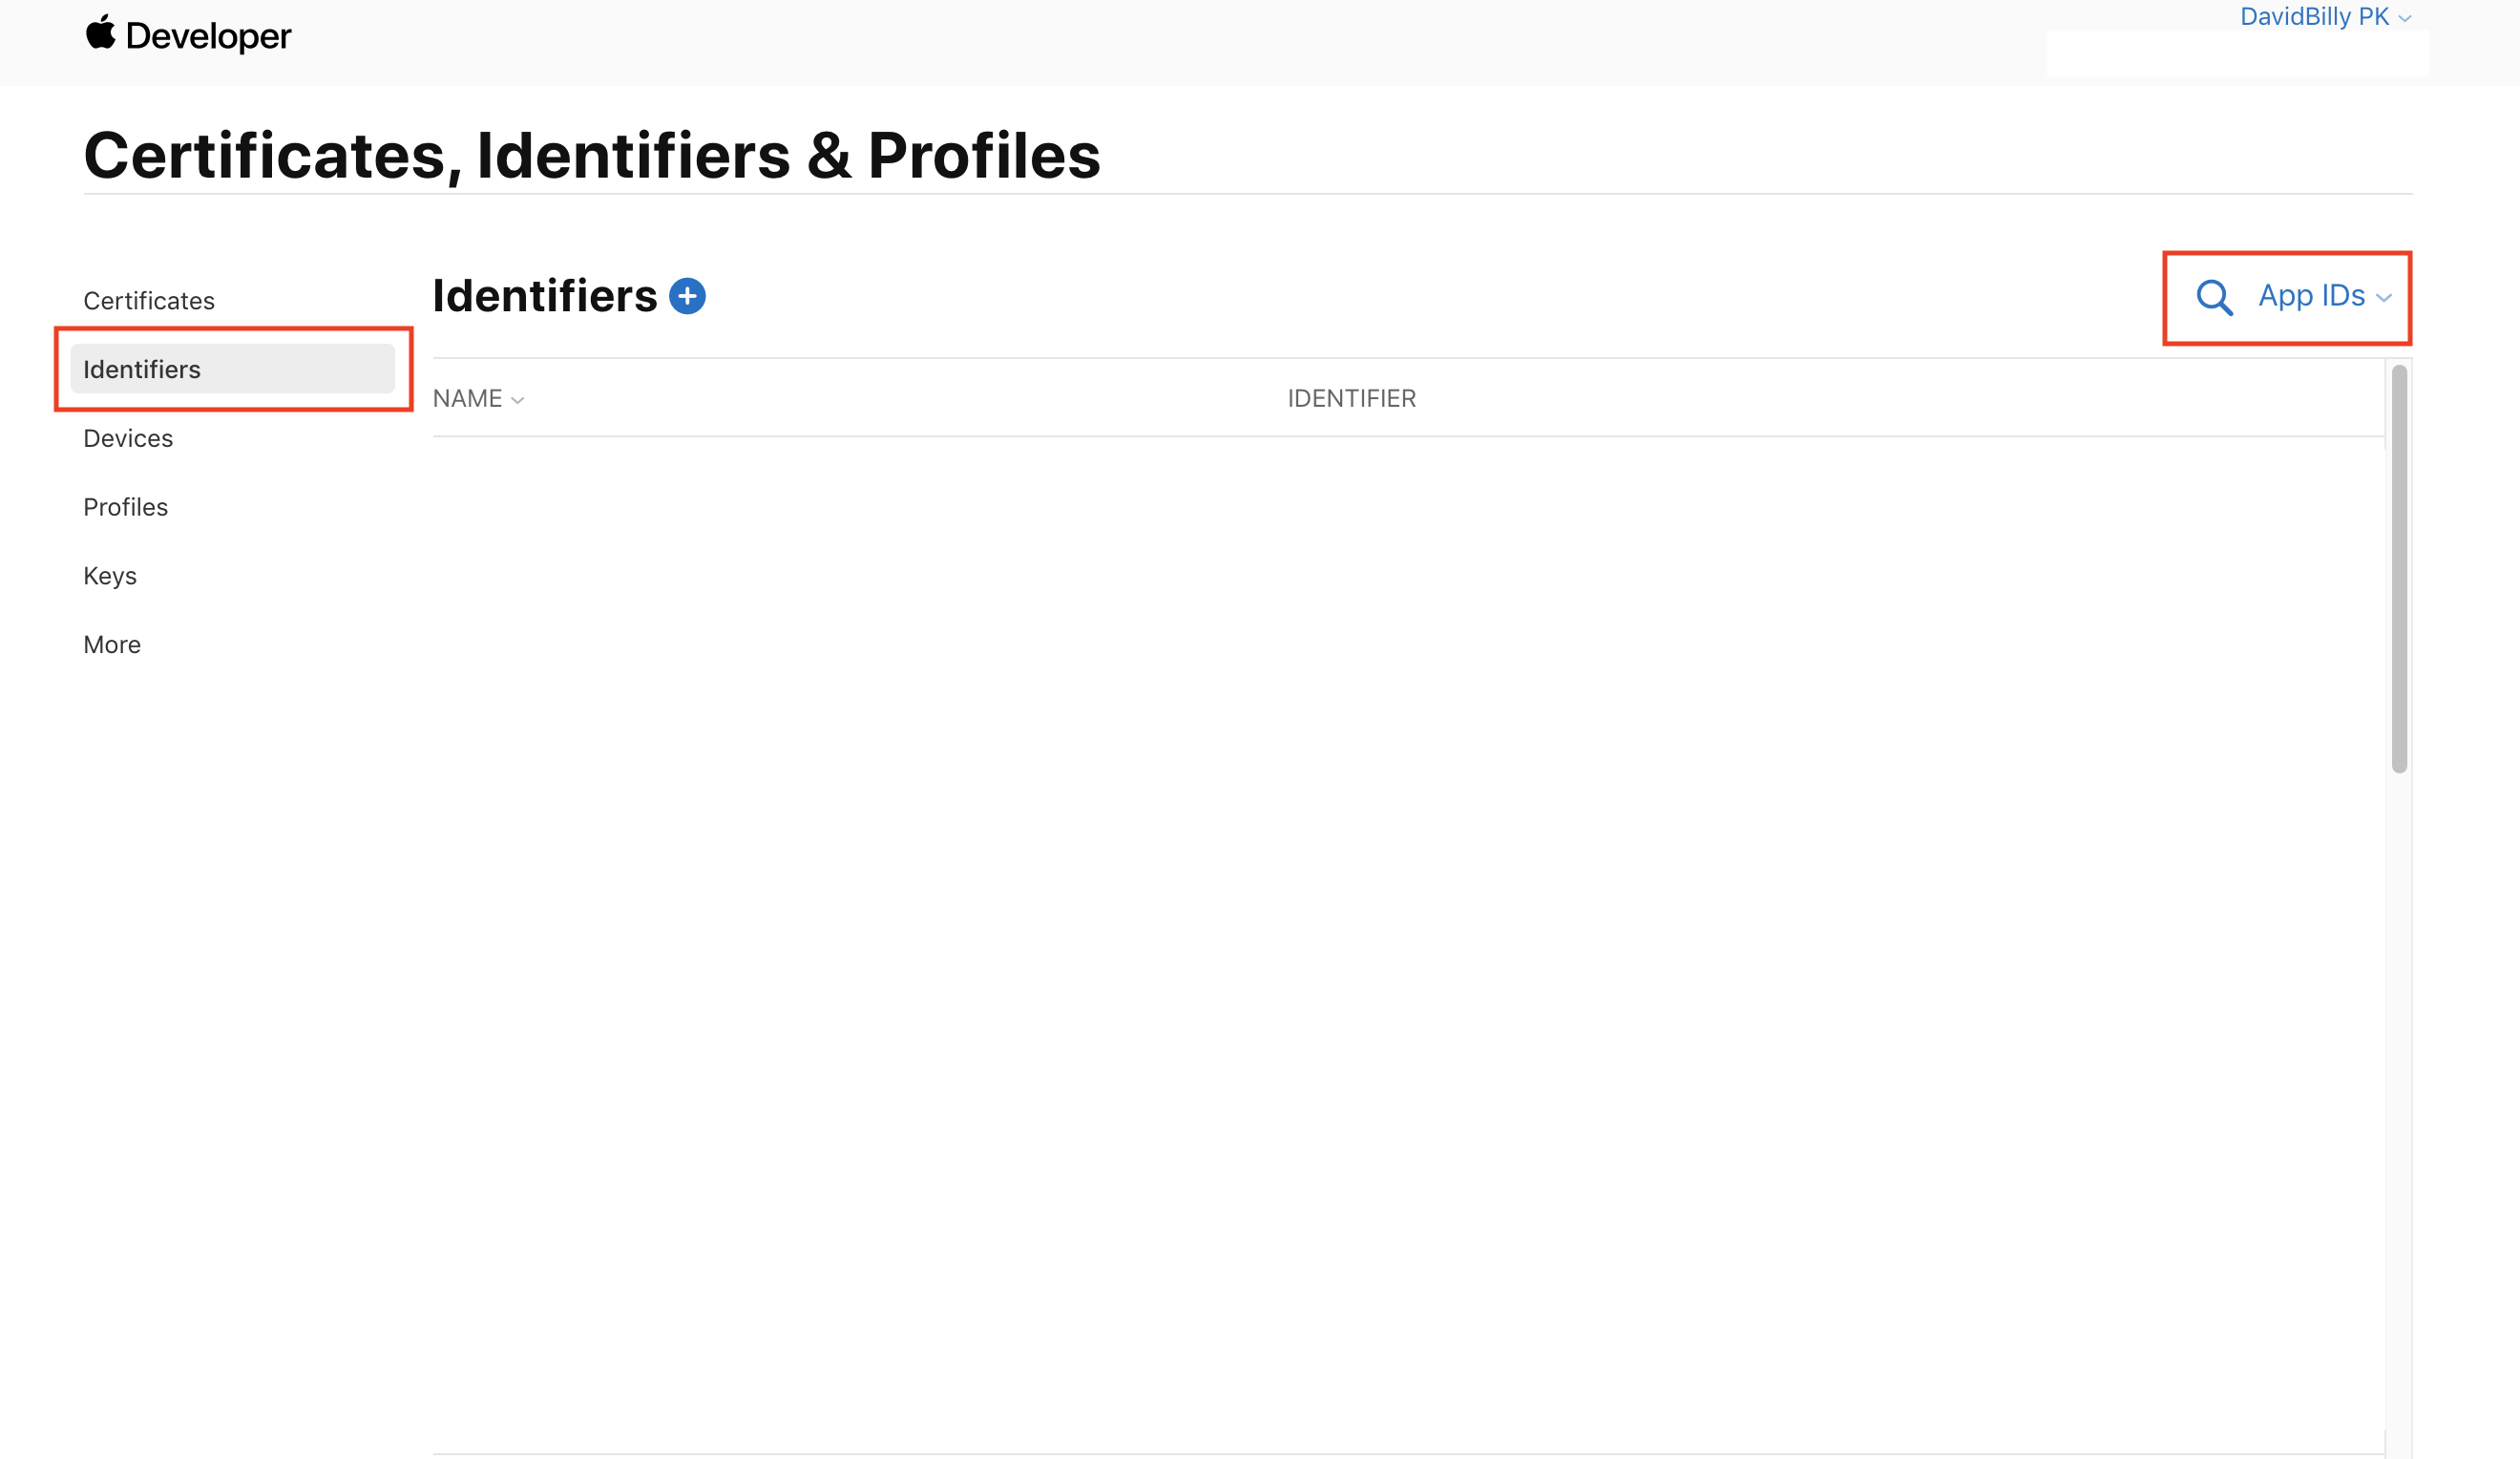
Step 2: Click on Identifiers, and on filter.
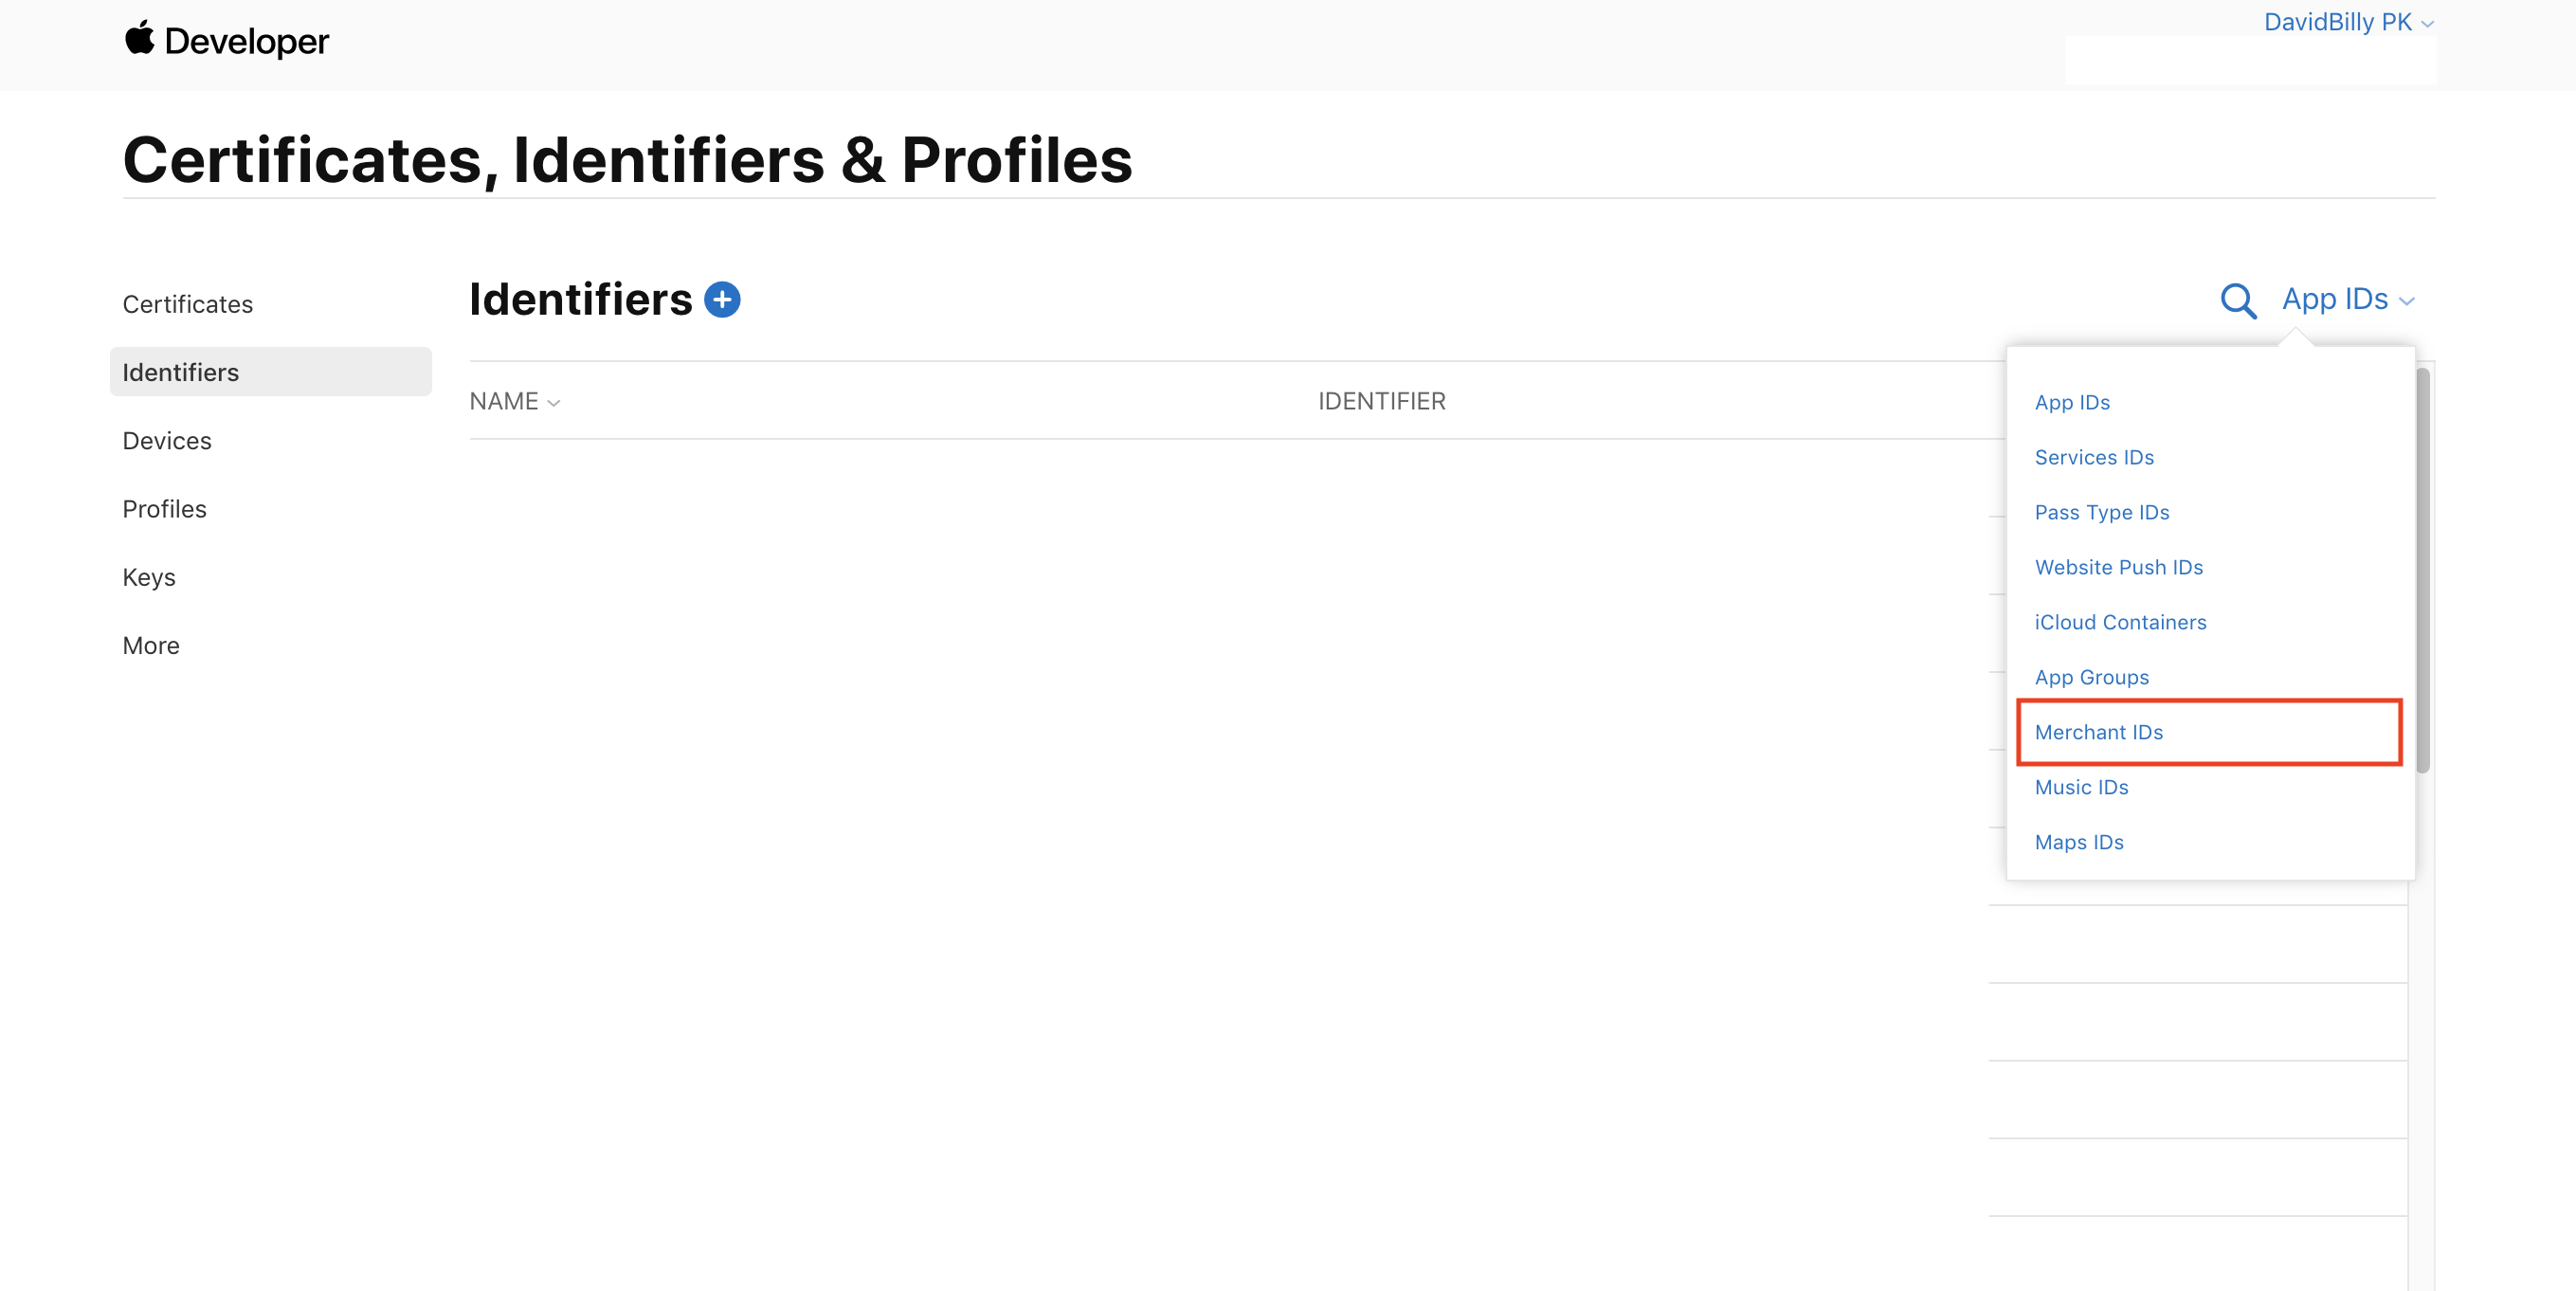
Step 3: Filter by Merchant IDs.
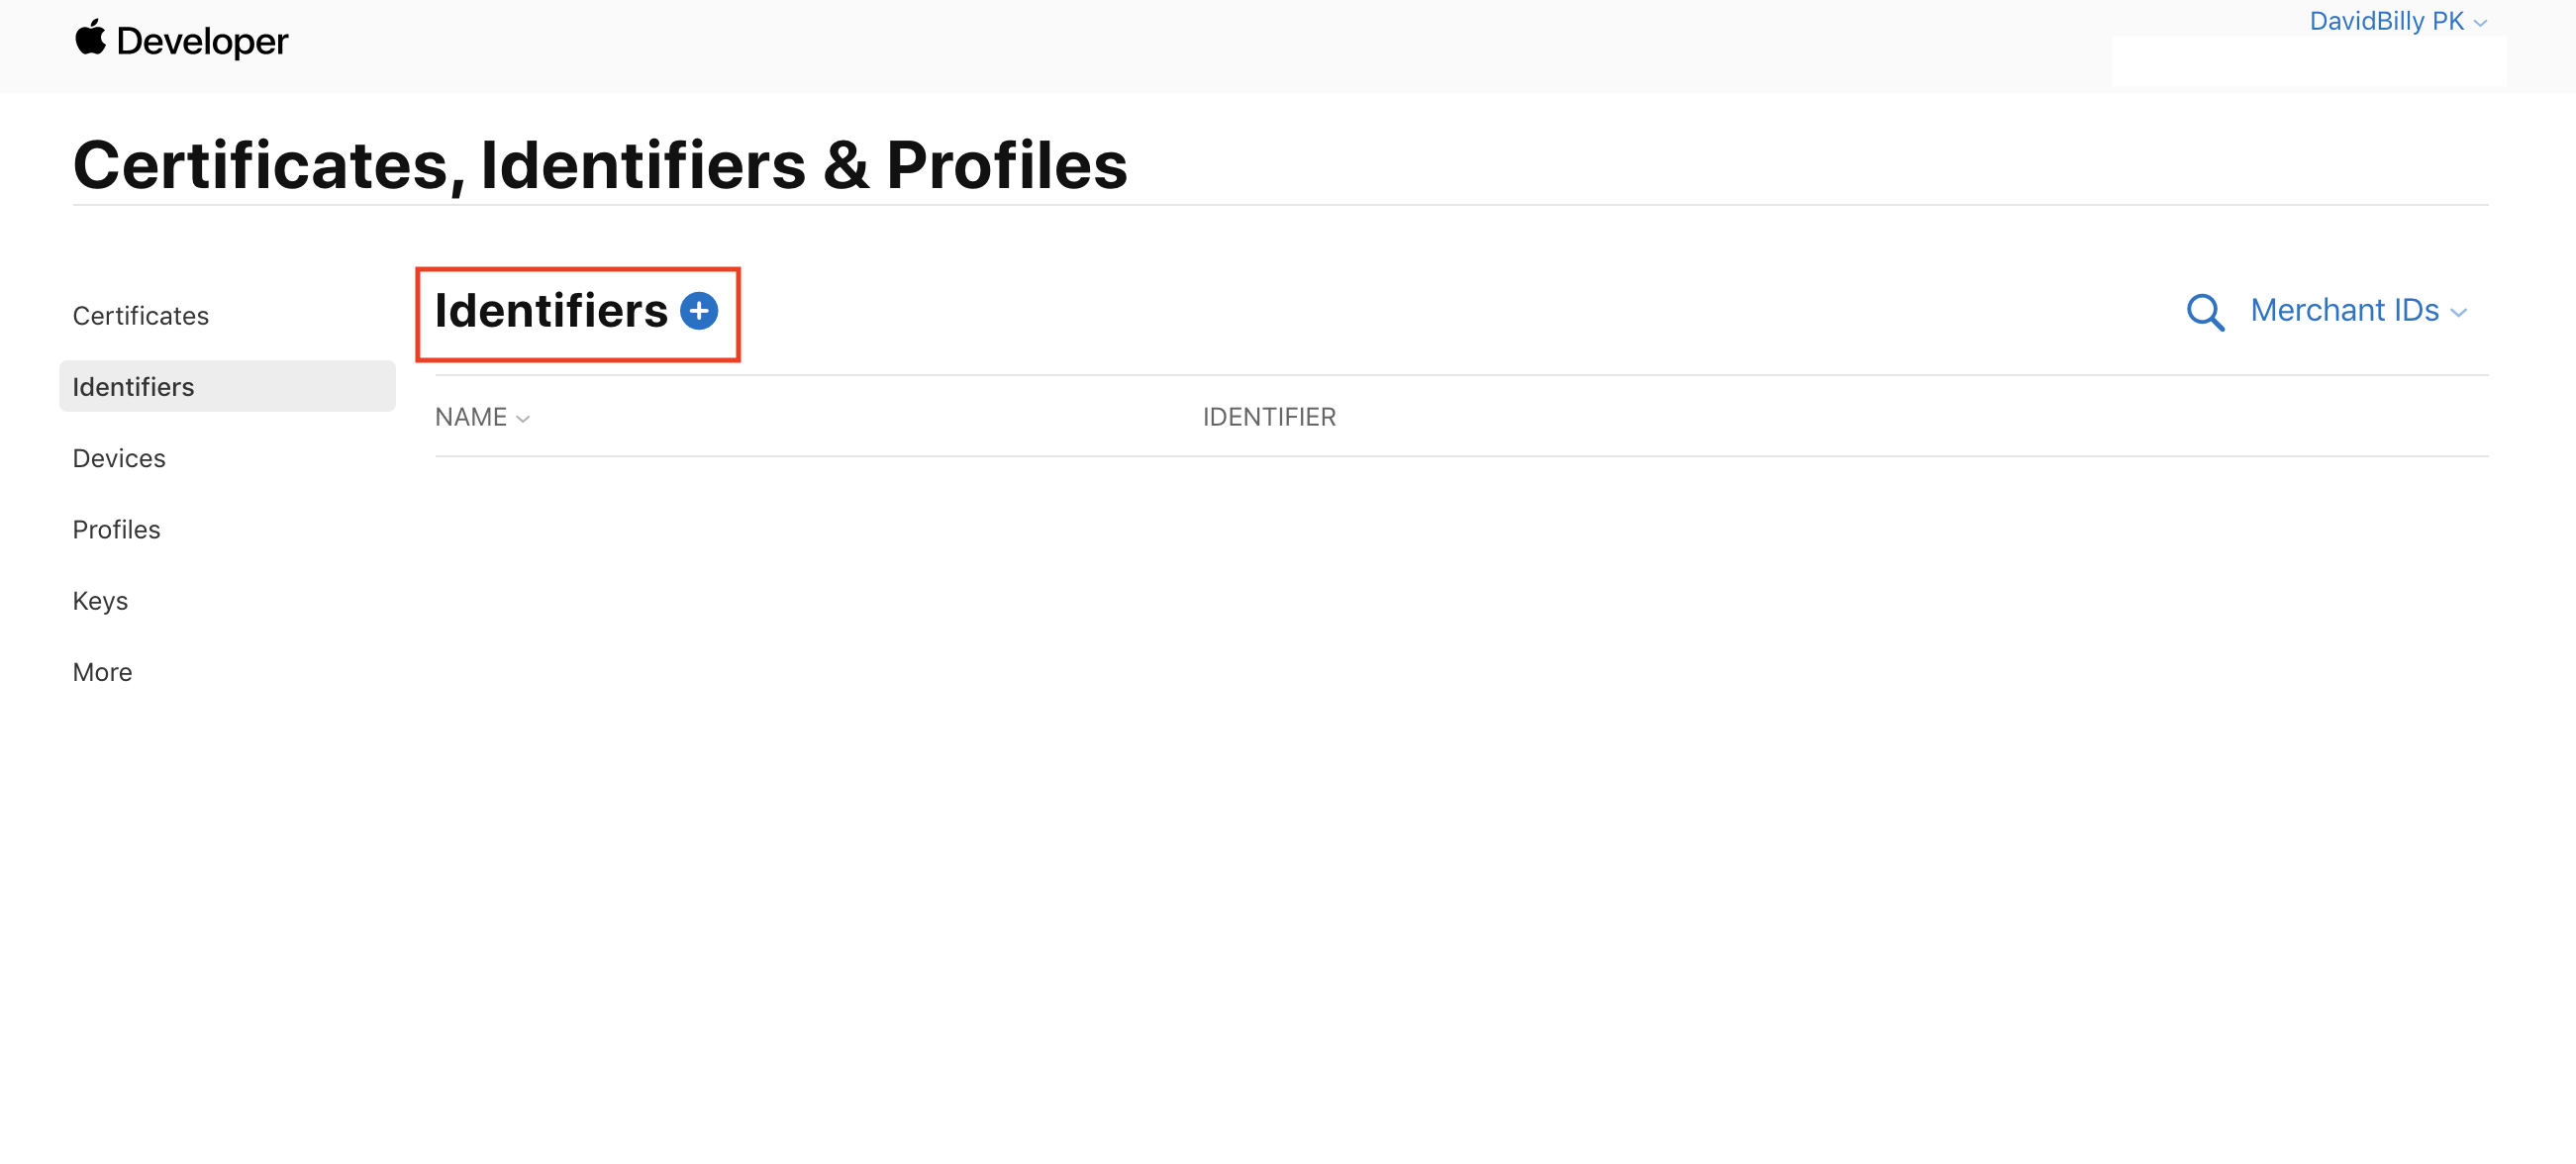
Step 4: Click on add new Identifiers.
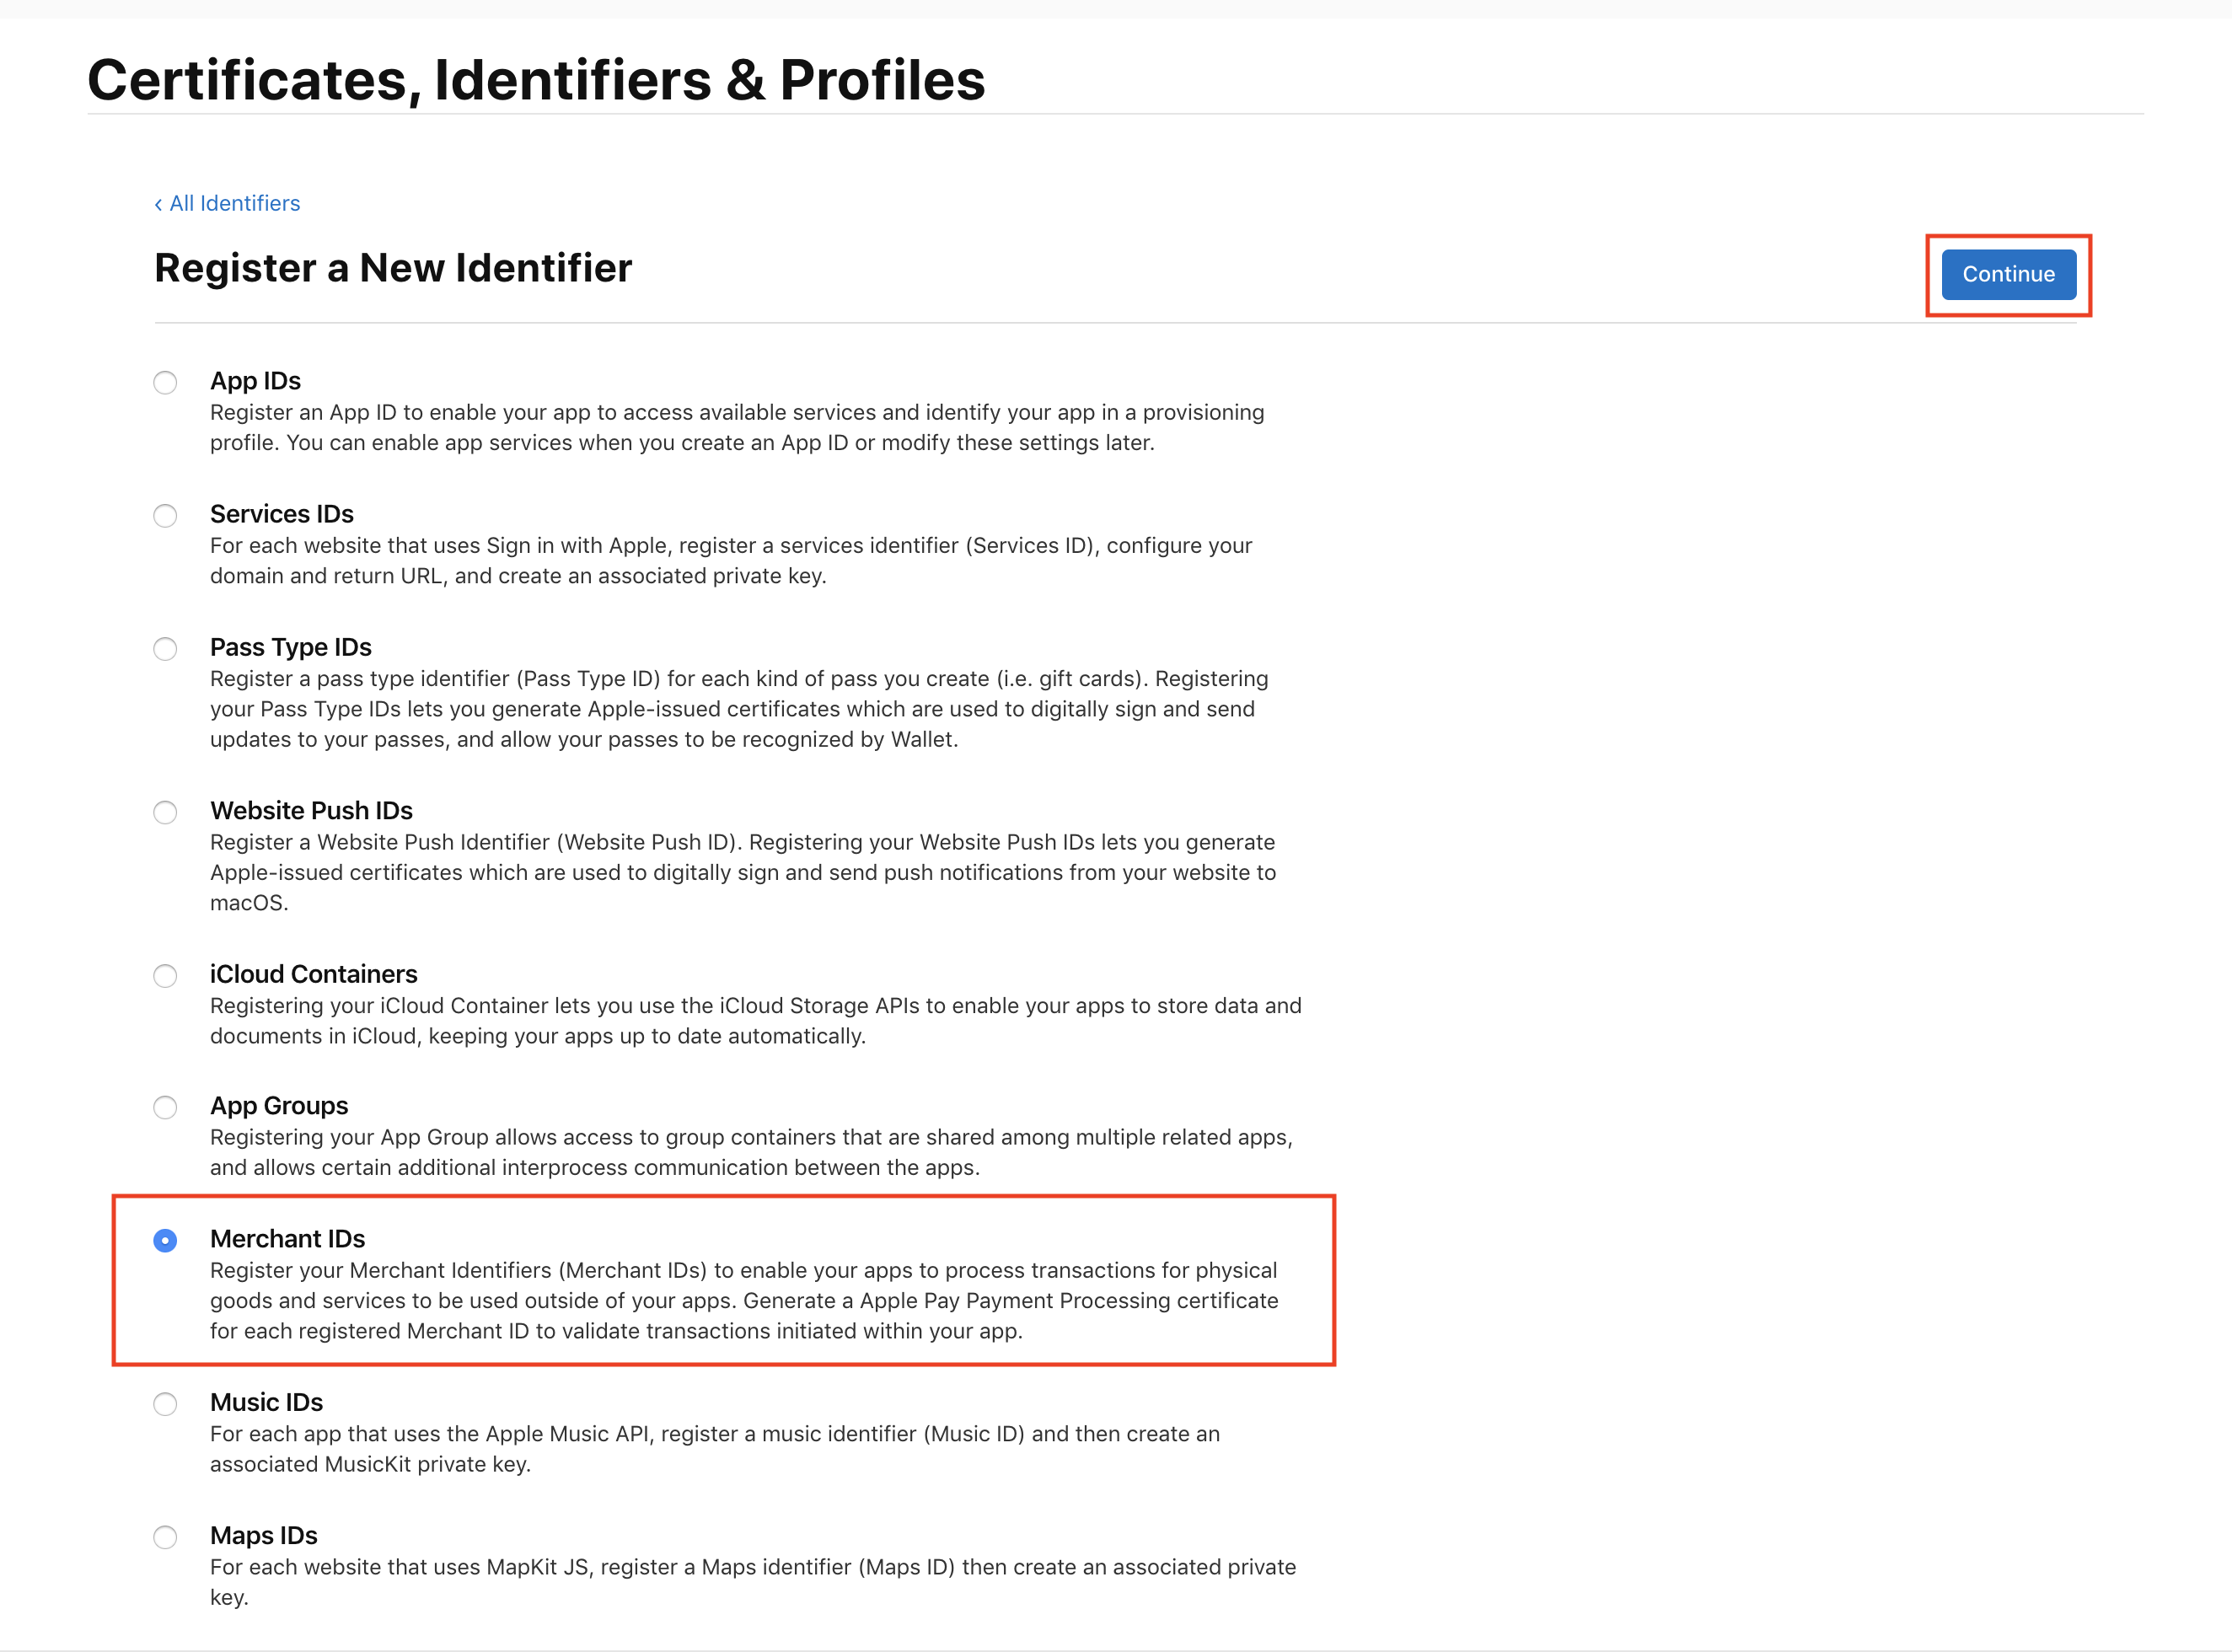
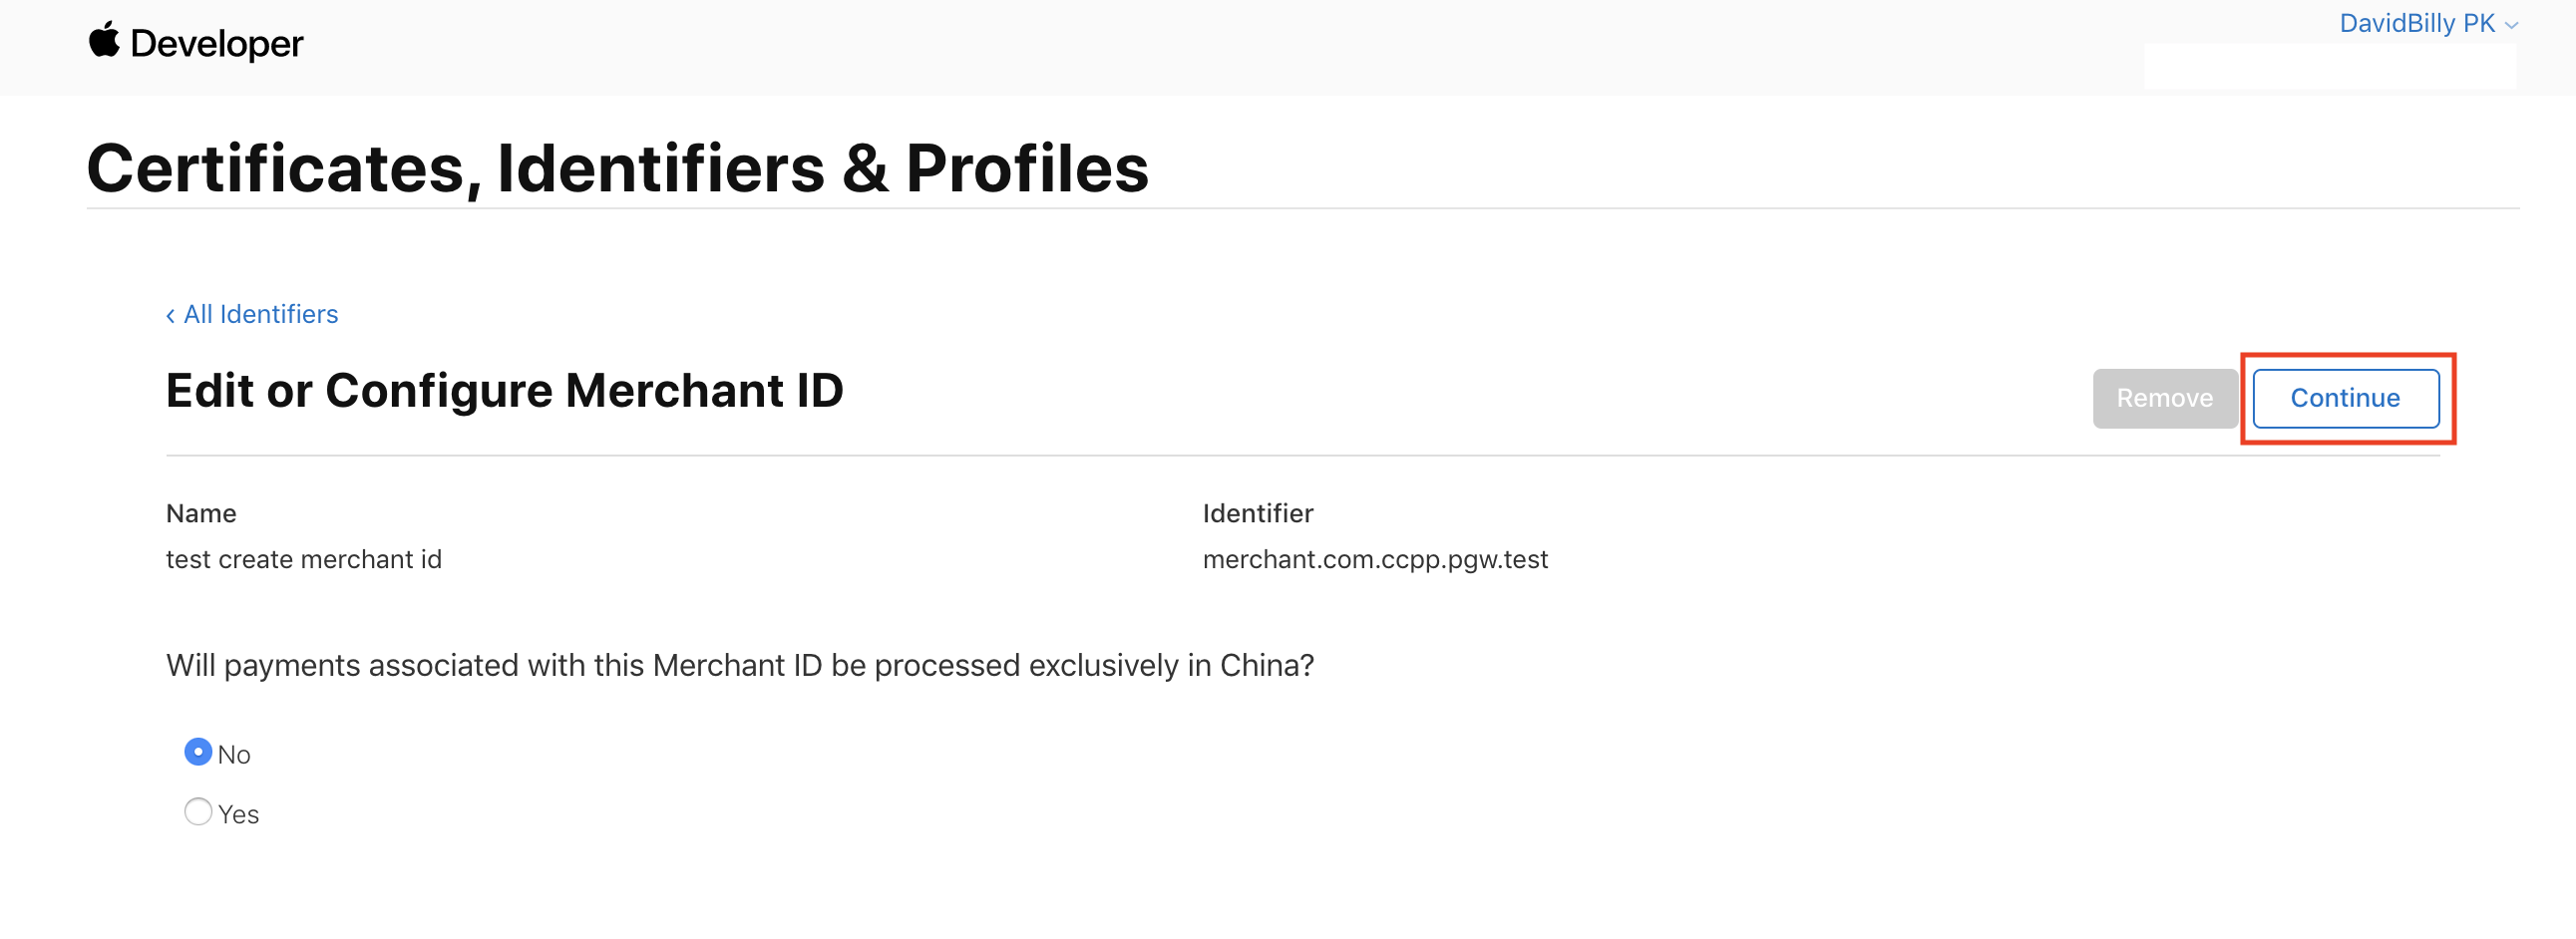
Step 5: Register new Merchant ID and click on continue.
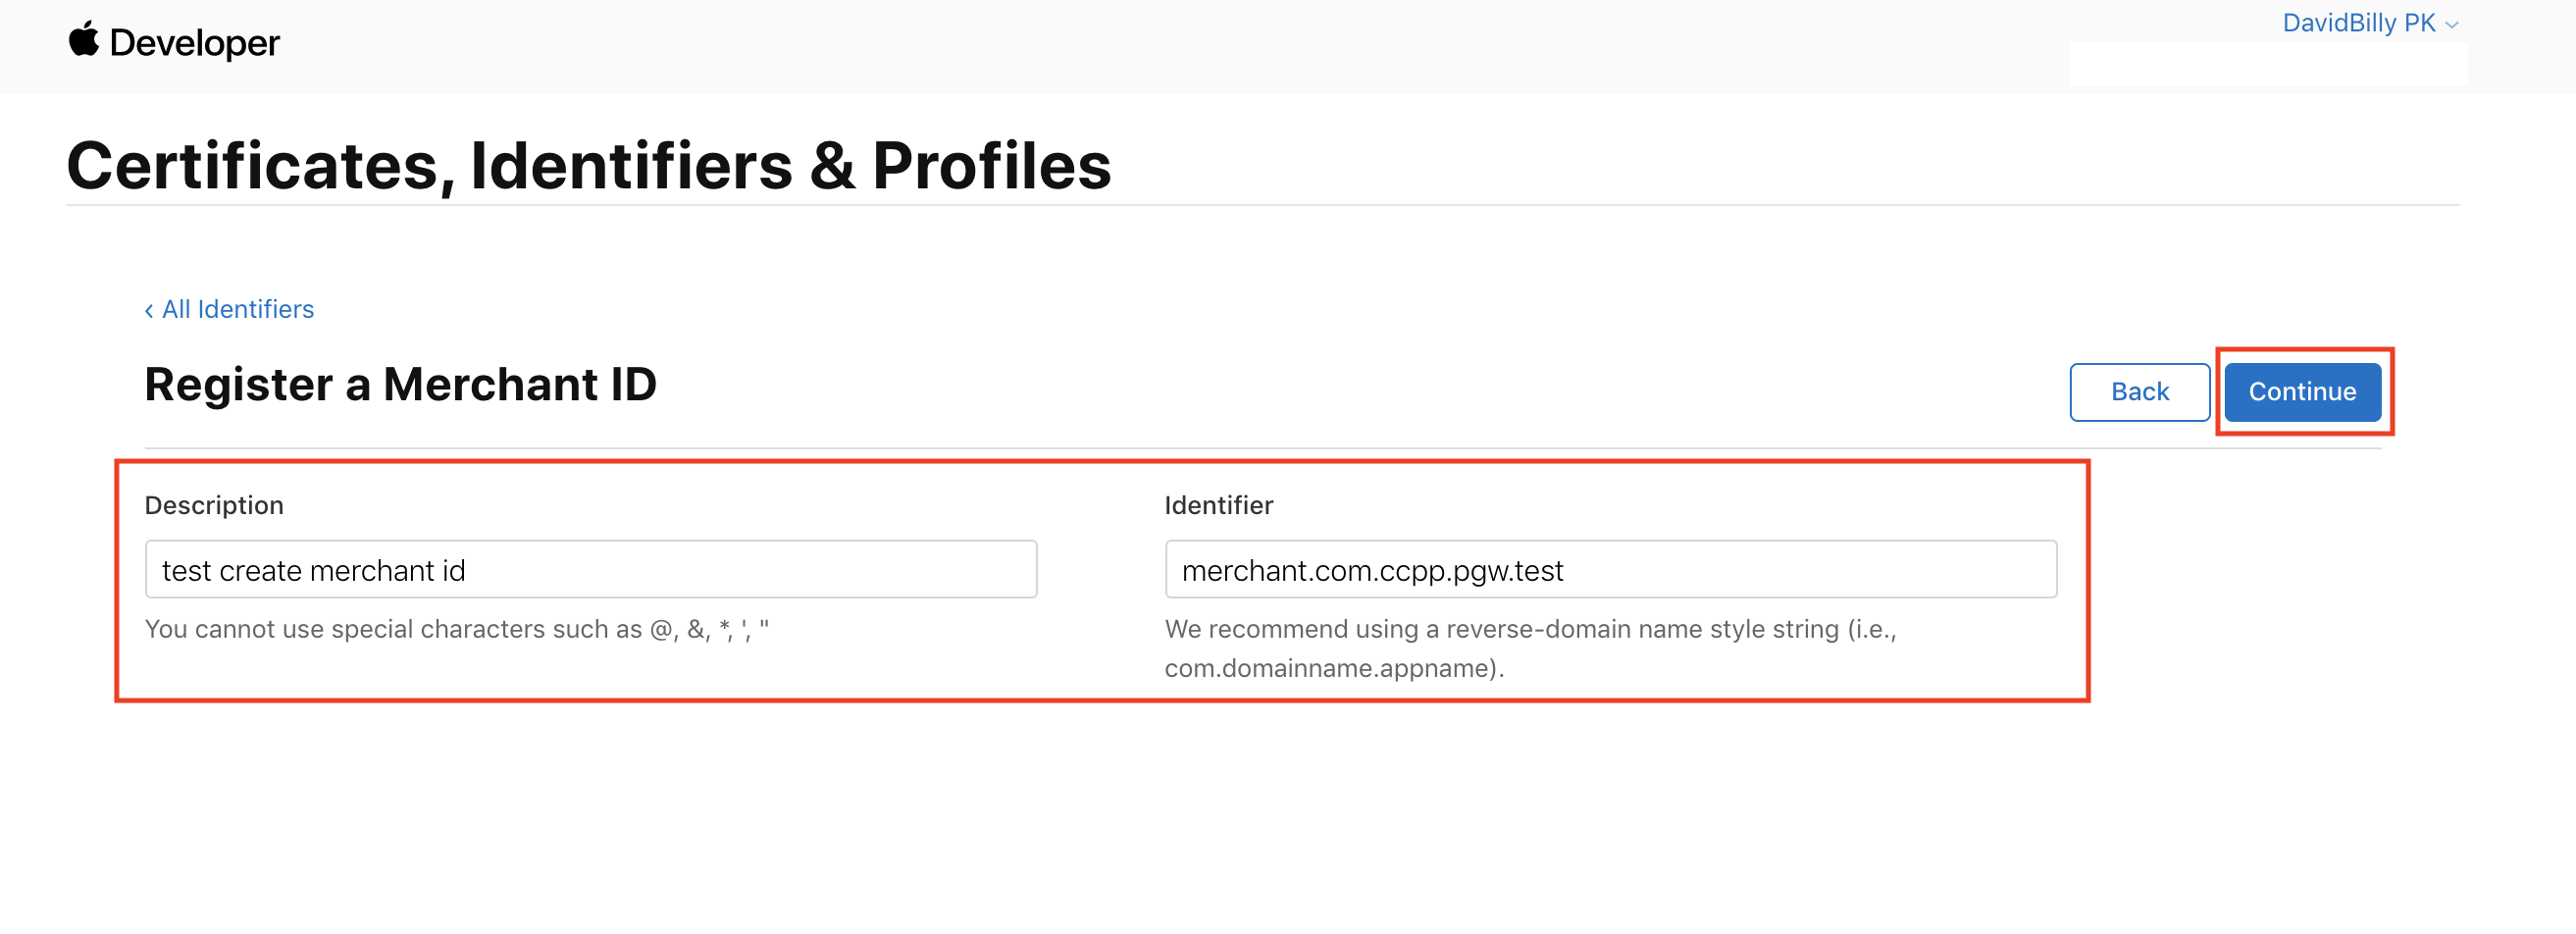
Step 6: Fill in description and unique identifier (Recommend using merchant.com.{your.app.id}). Then click on continue.
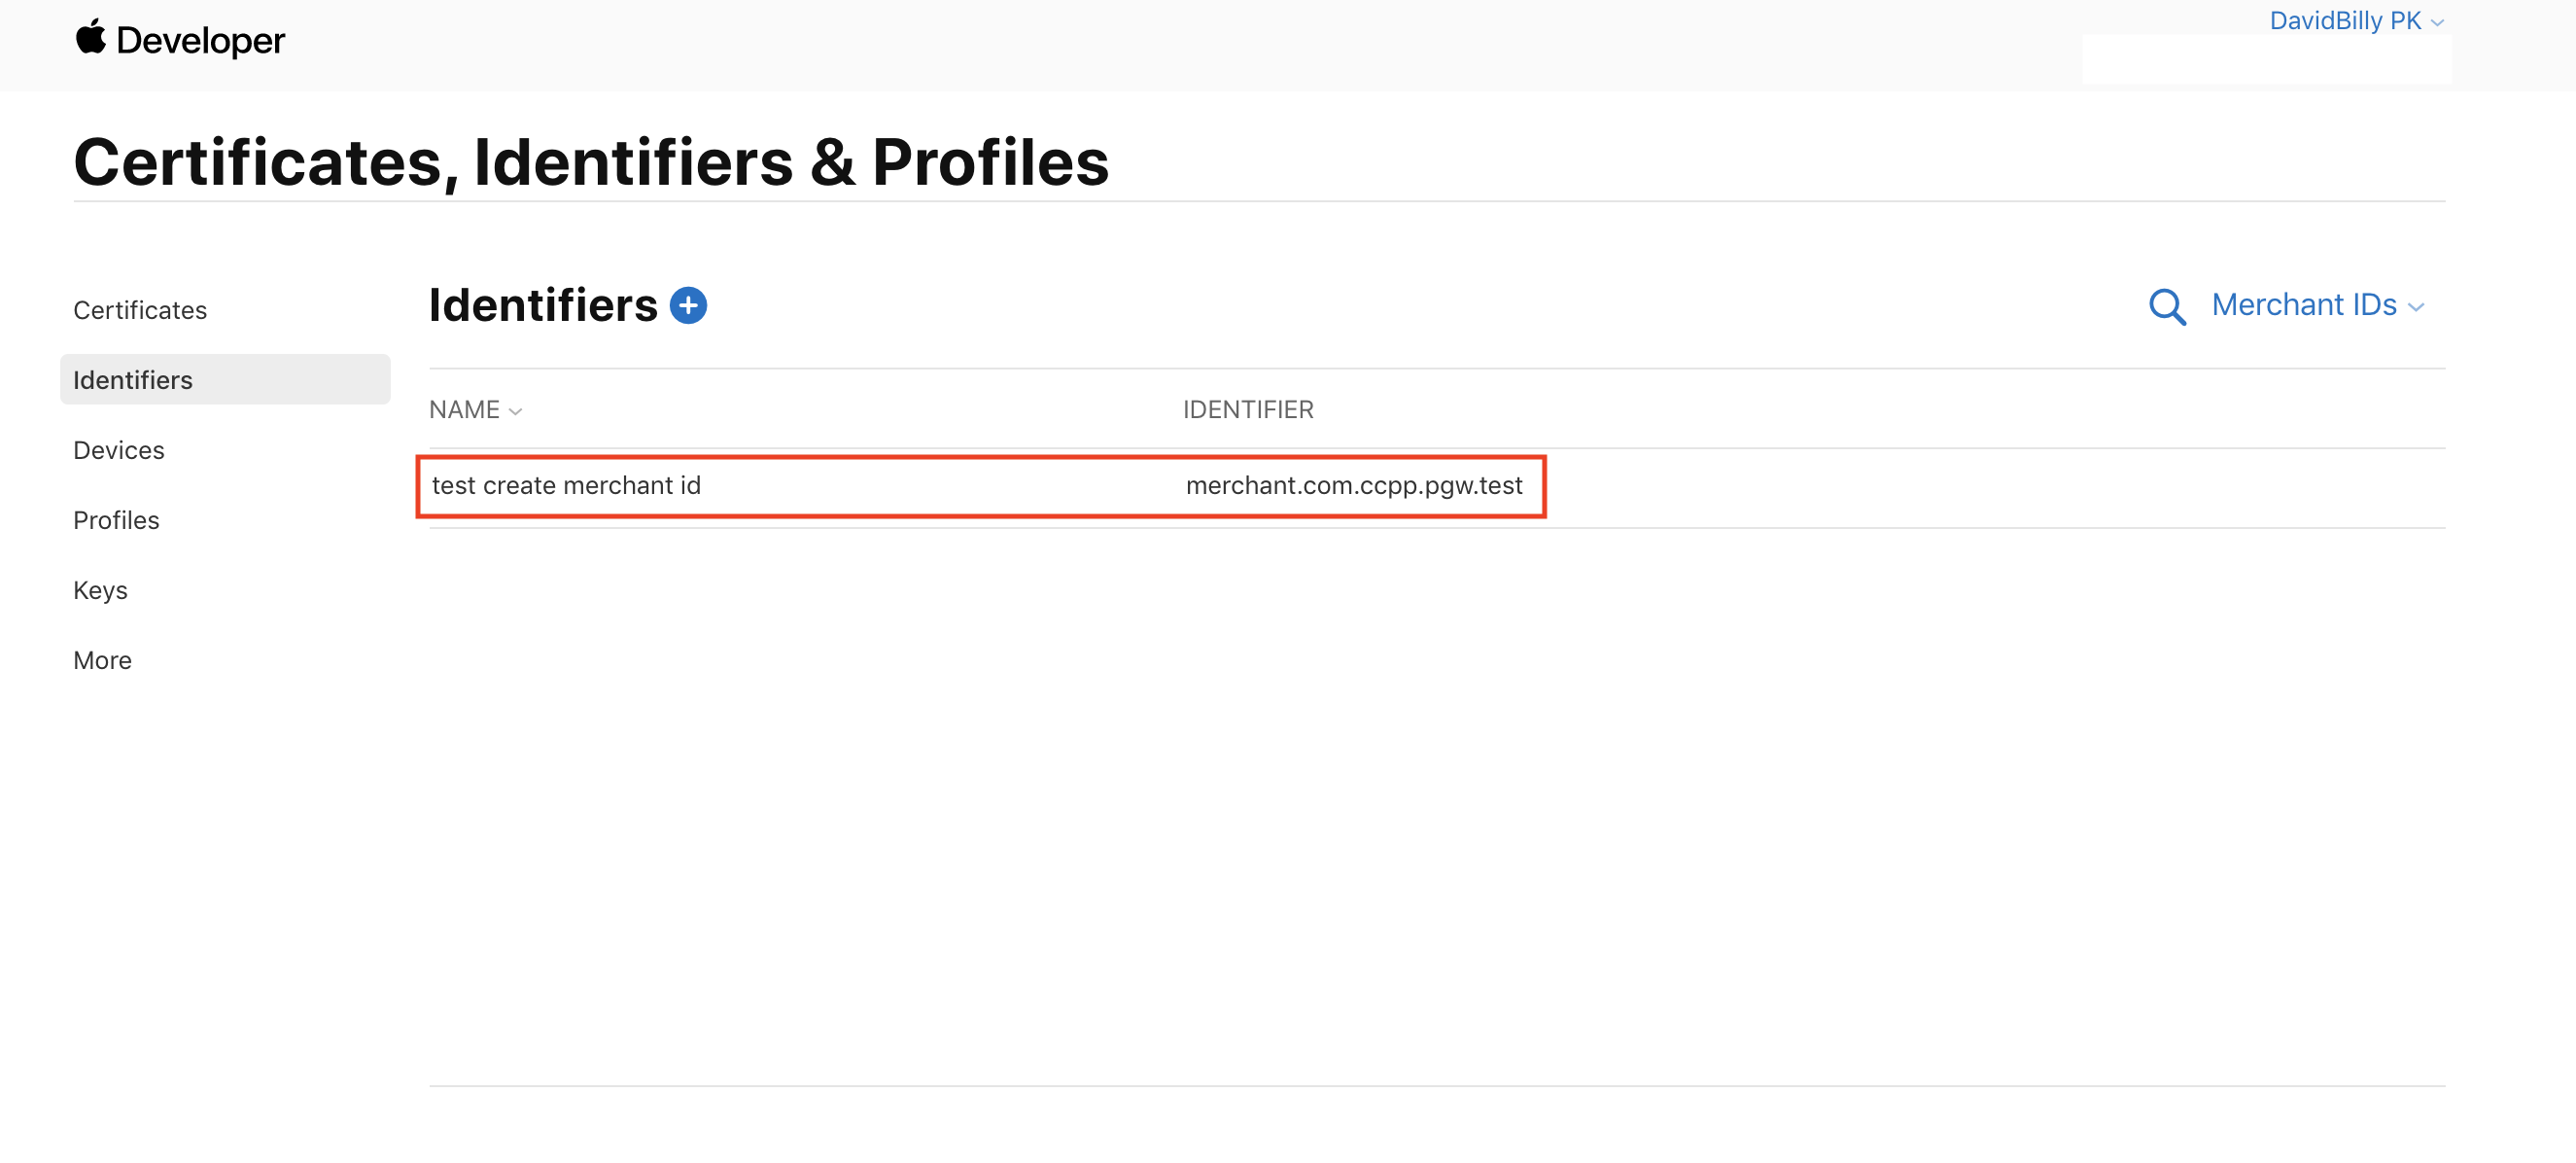
Step 7: After registered successfully, you'll see your merchant ID on the list.
2) Create a new Apple Pay certificate.
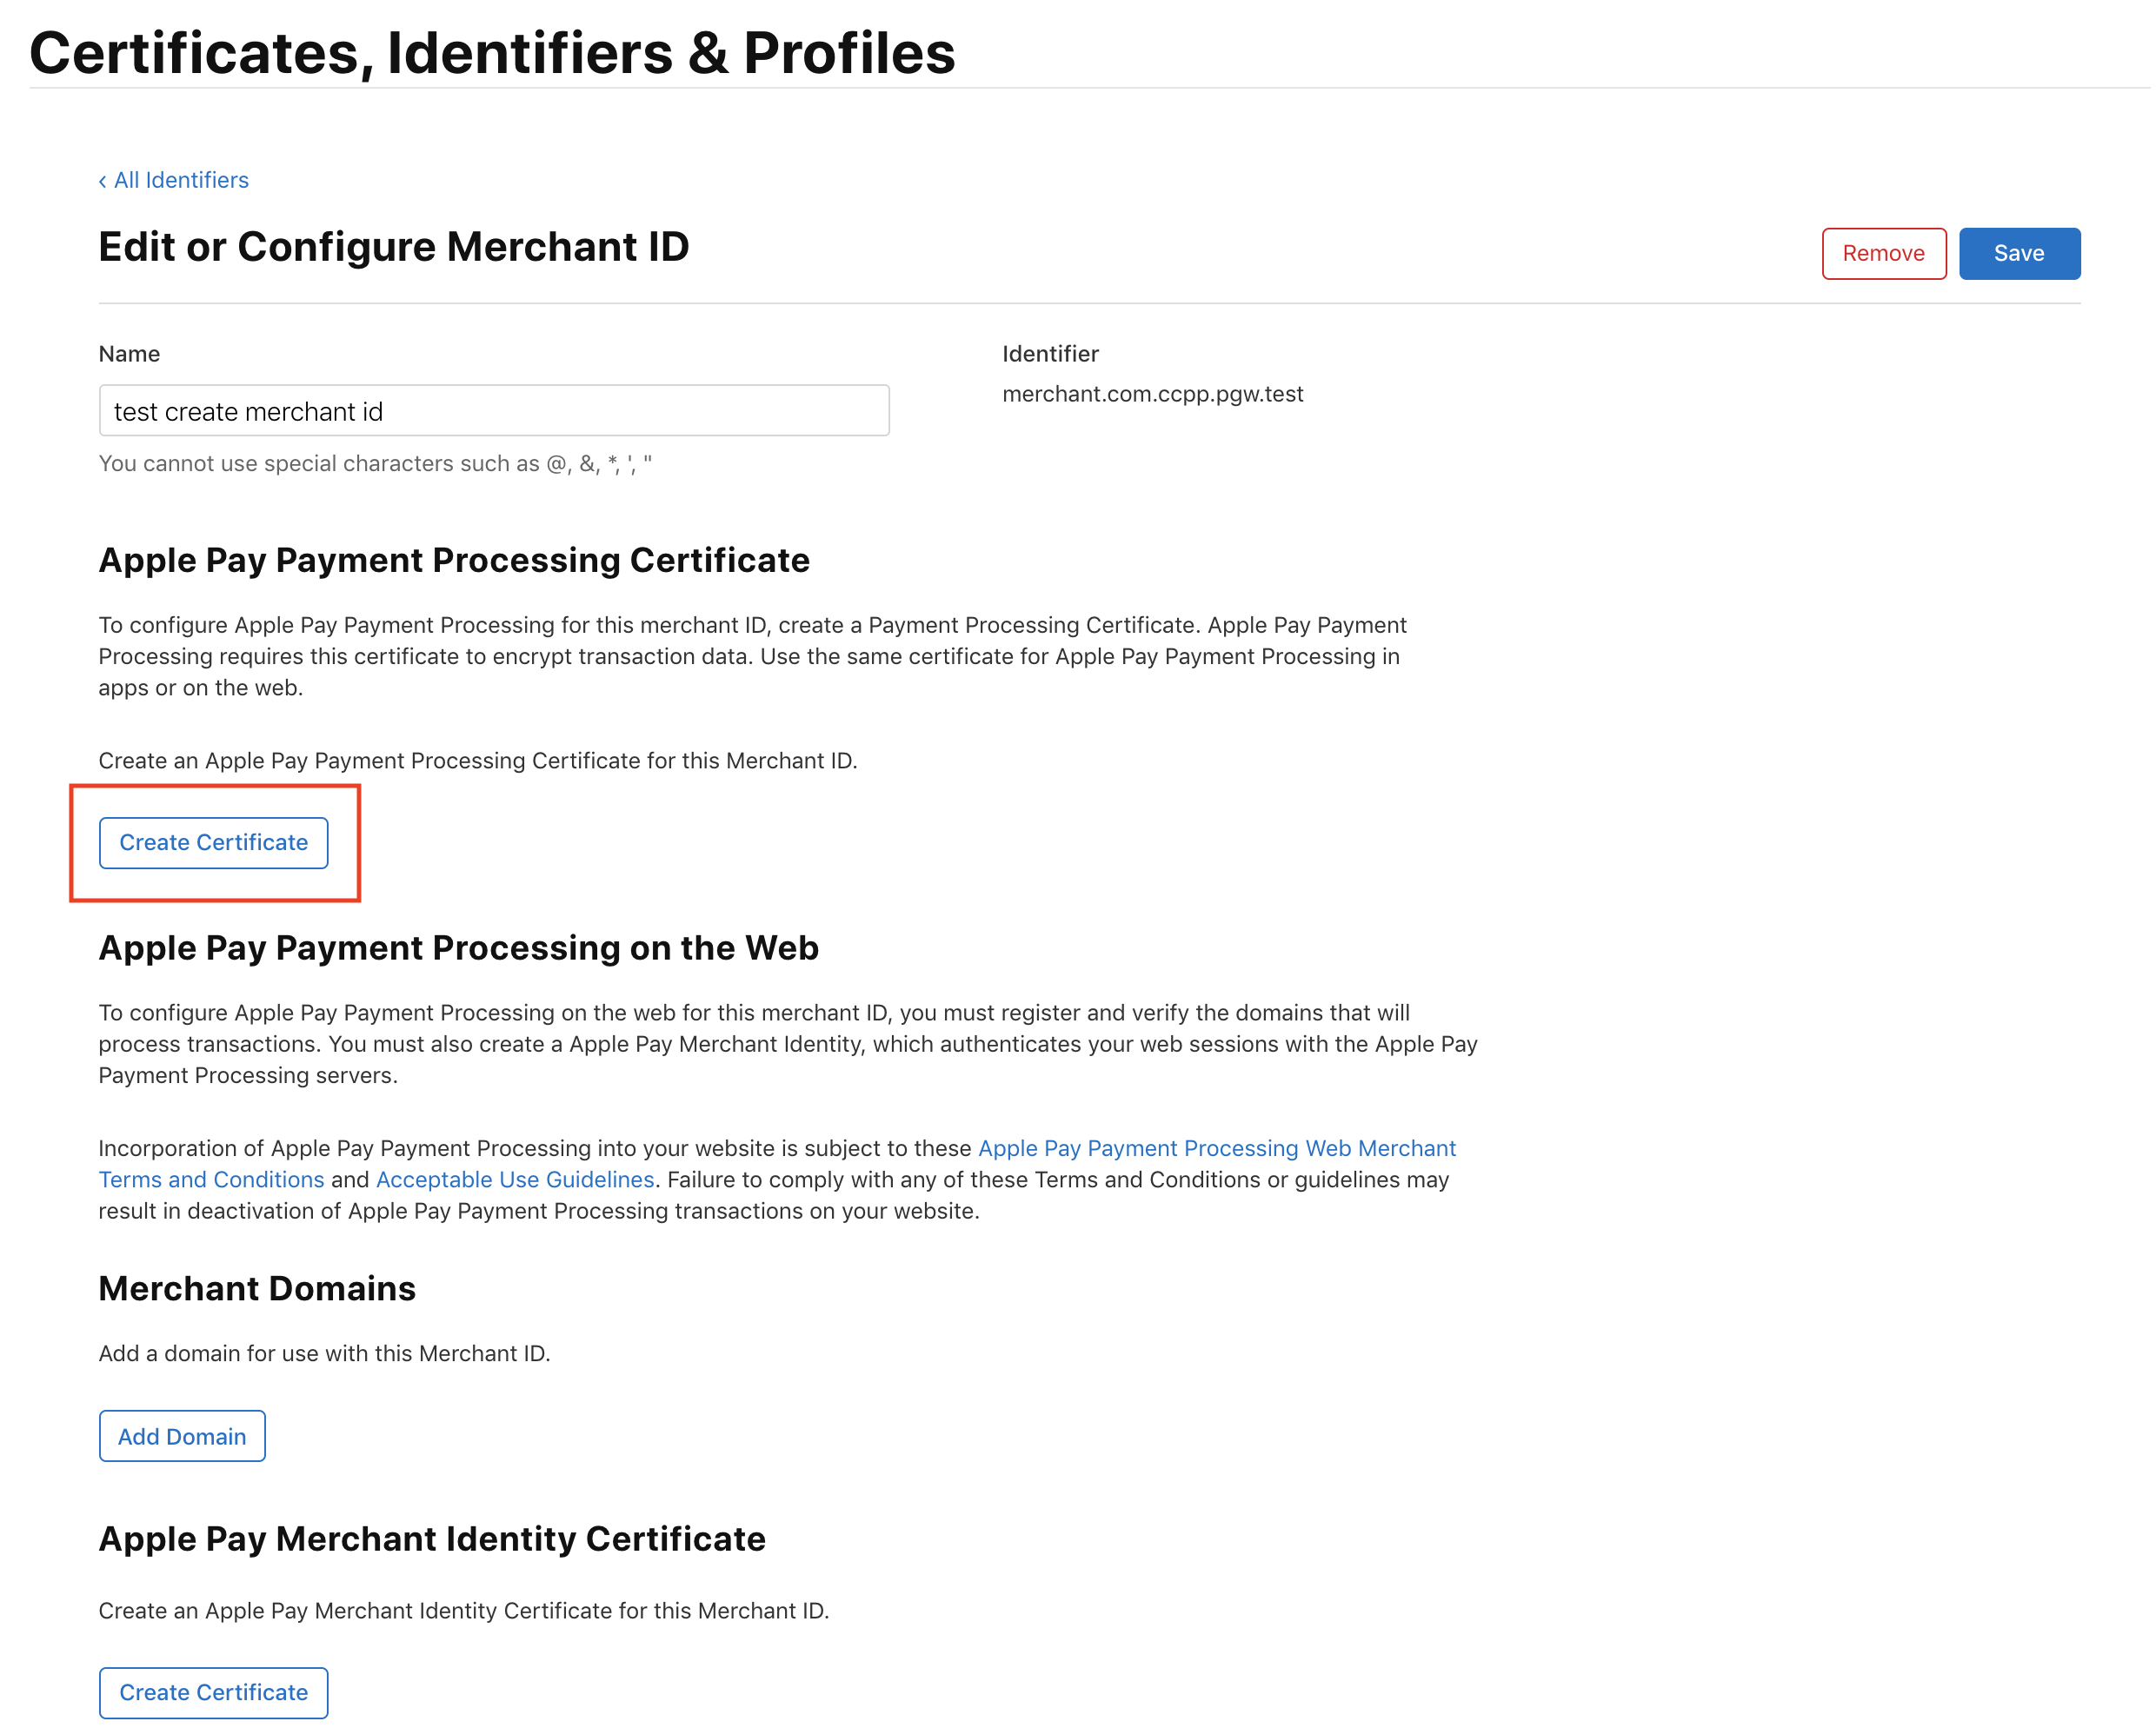
Step 1: Create new Apple Pay Payment Processing Certificate.
Step 2: Click on continue.
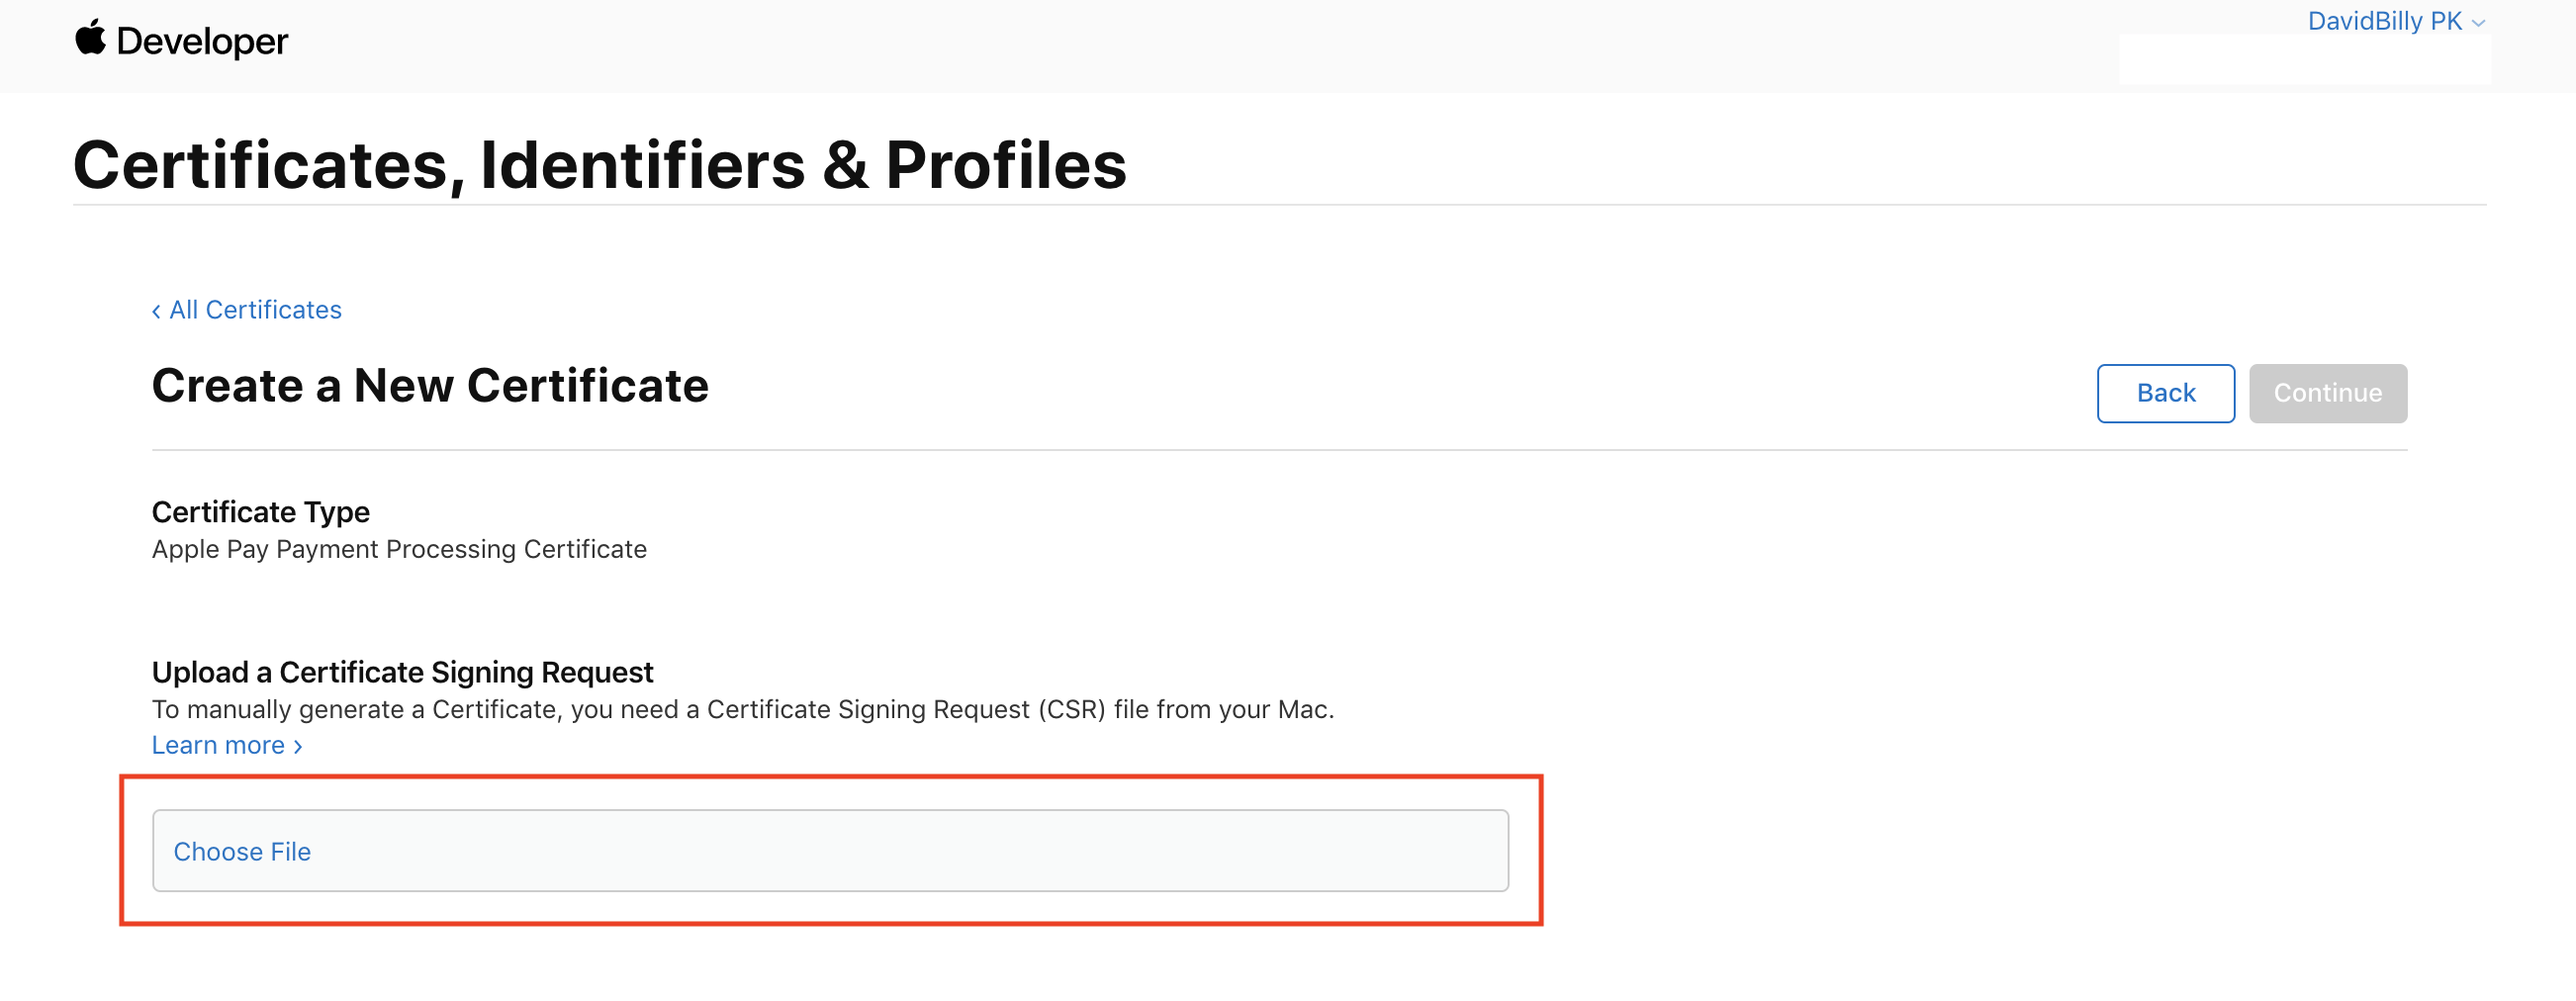
Step 3: Upload a Certificate Signing Request file. (Your can get CSR file from 2C2P PGW merchant portal or 2C2P merchant support).
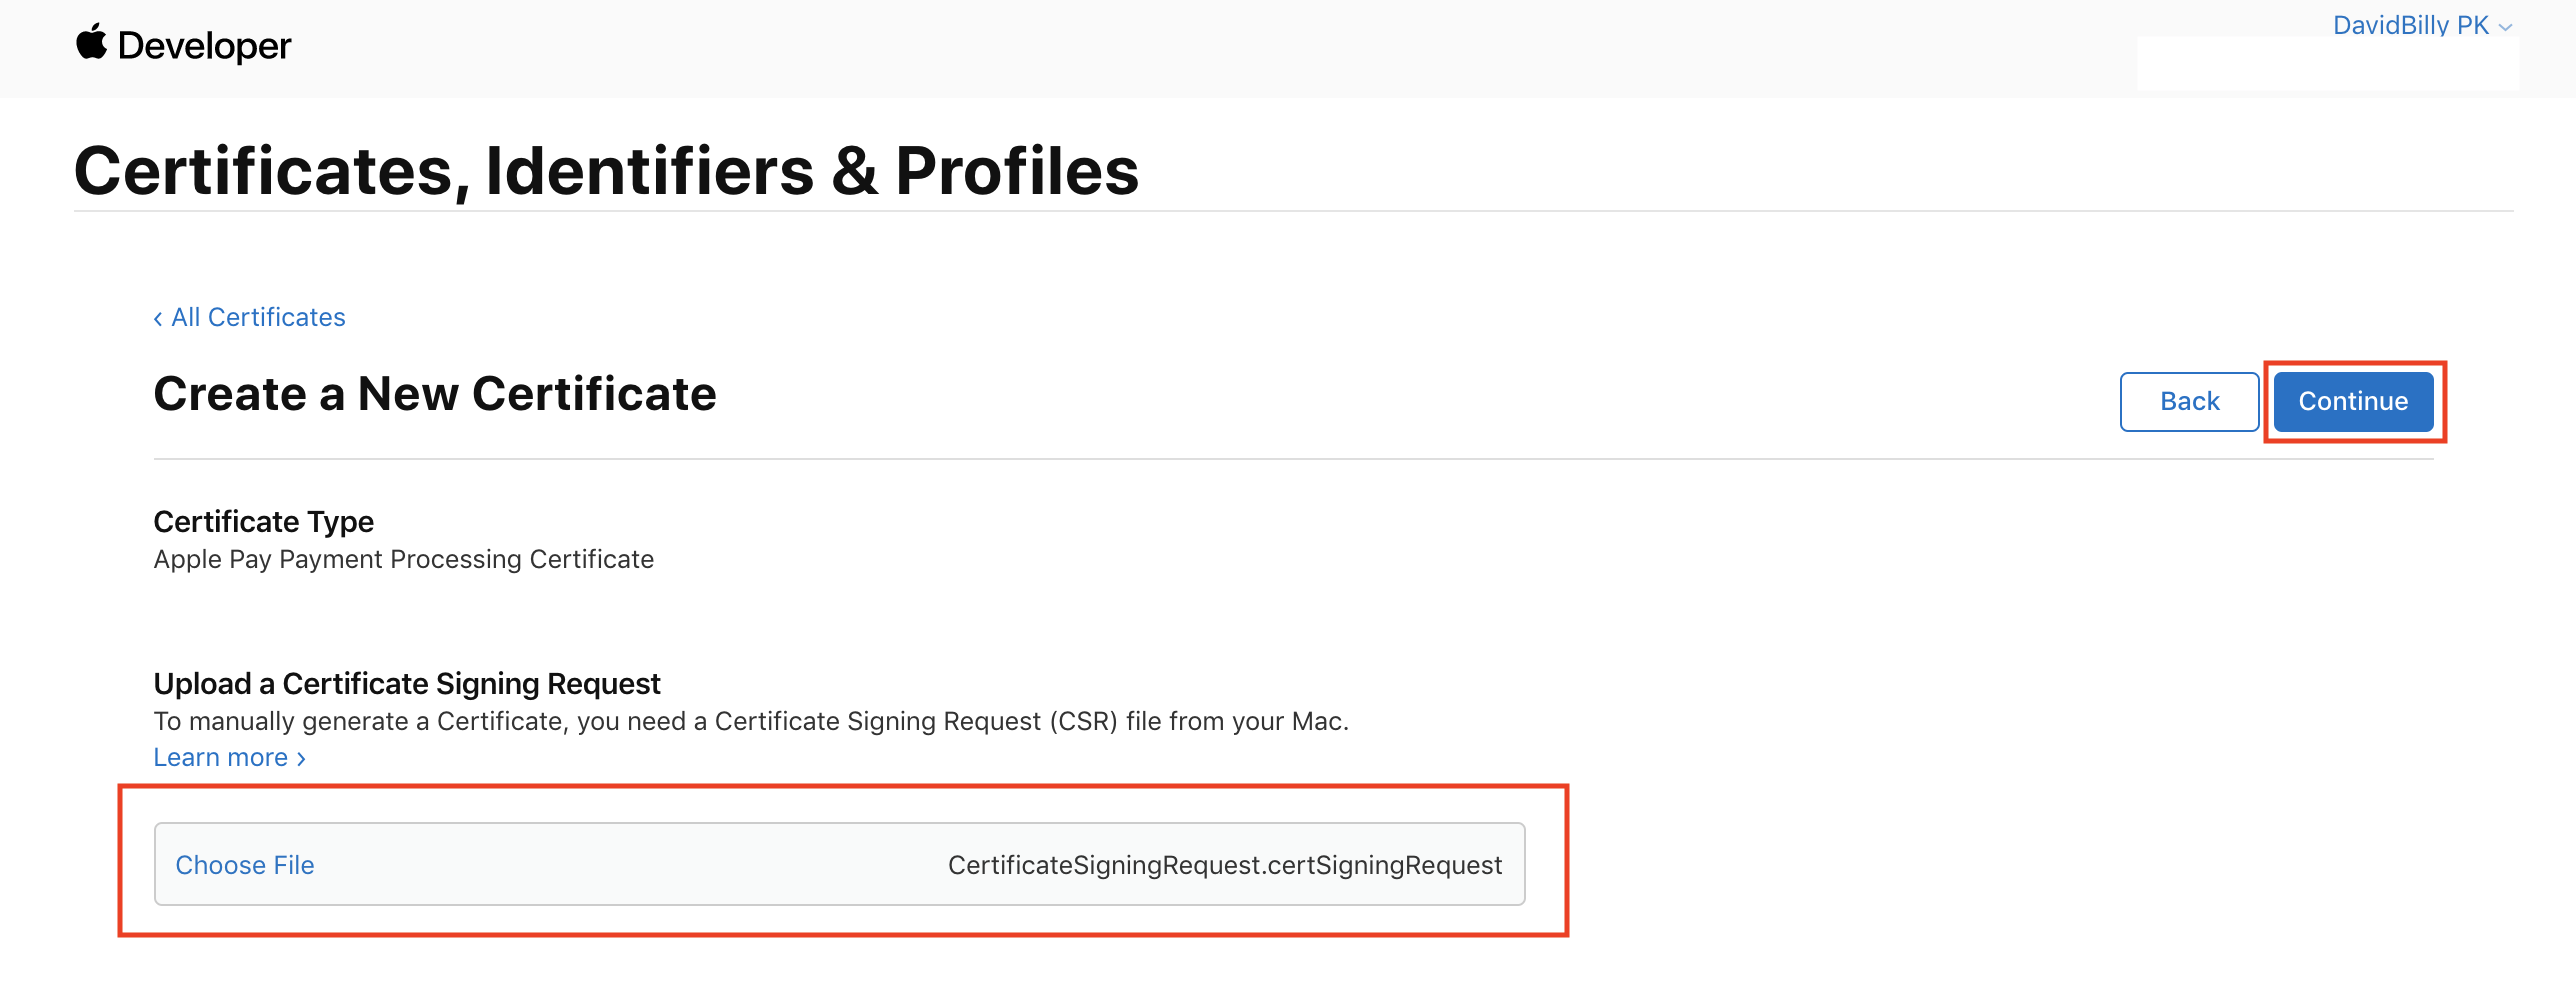
Step 4: Upload CSR file and click on continue.
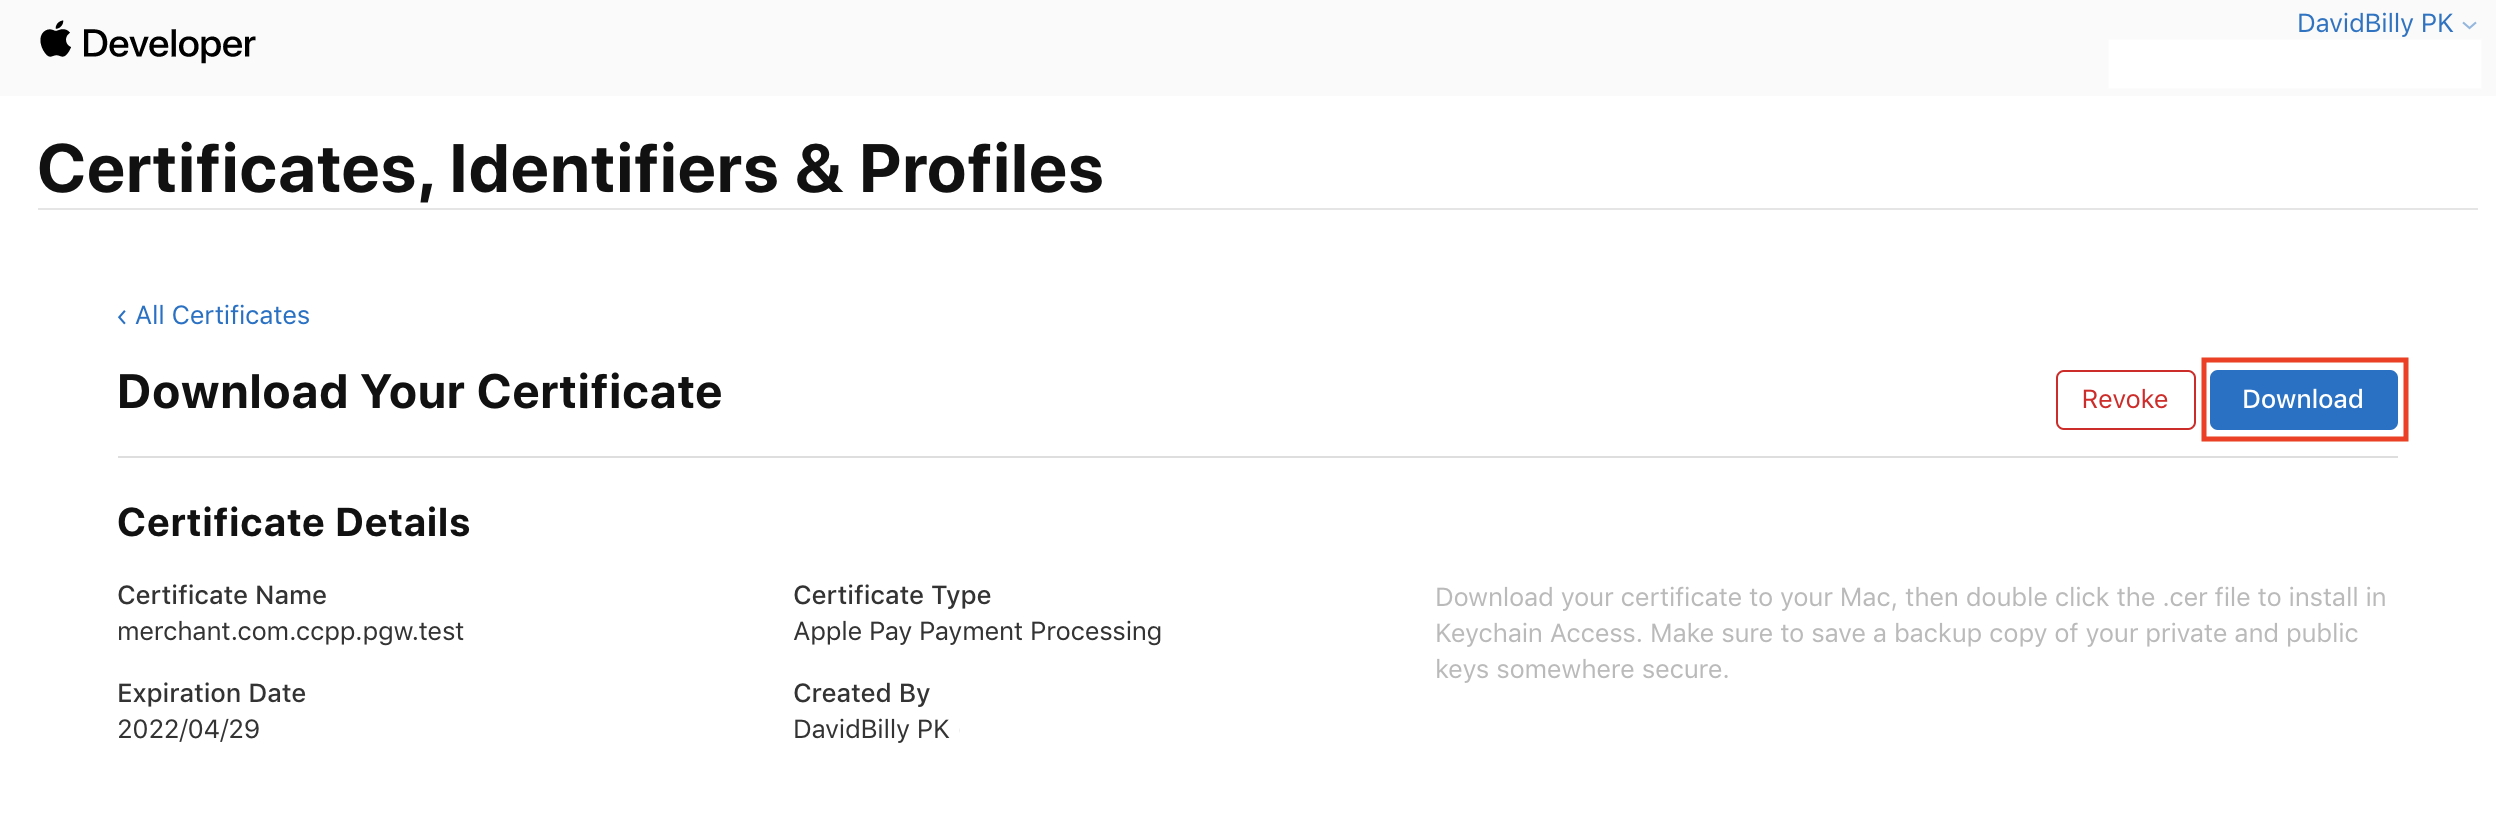
Step 5: Download the CER file (apple_pay.cer) and upload to 2C2P PGW merchant portal.
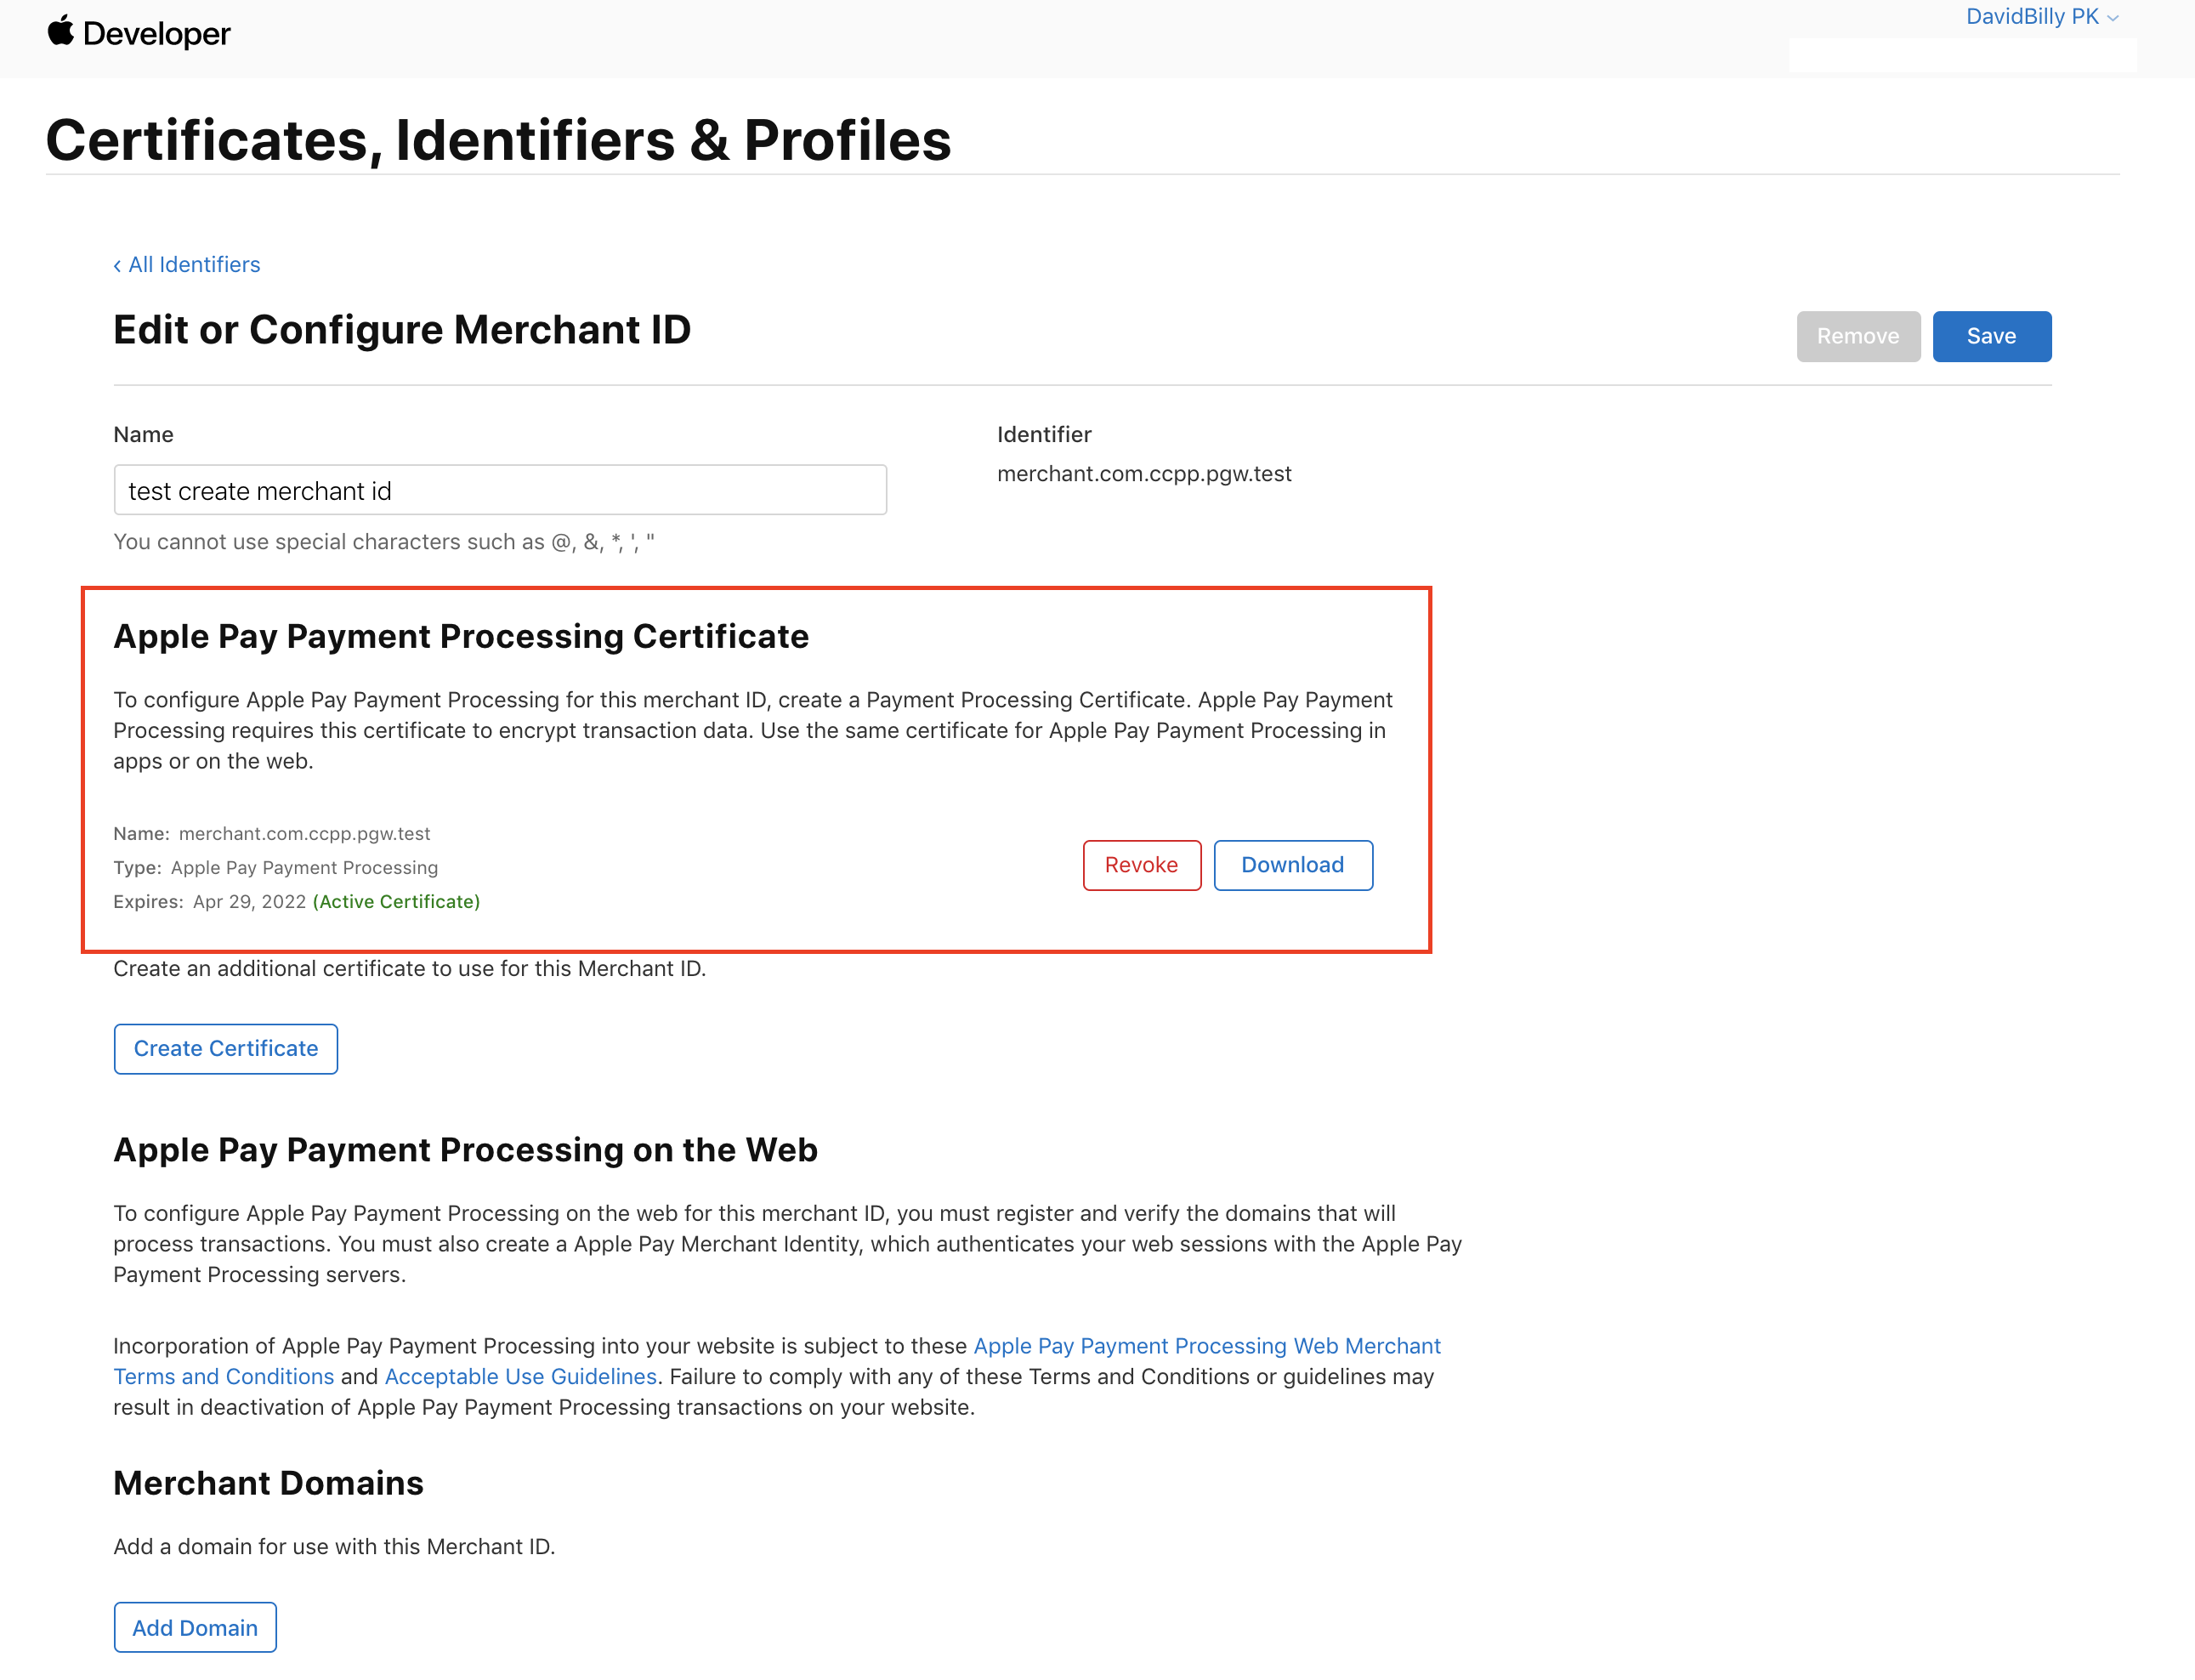
Step 6: You'll see your Apple Pay Payment Processing Certificate information.
3) Enable Apple Pay for your application.
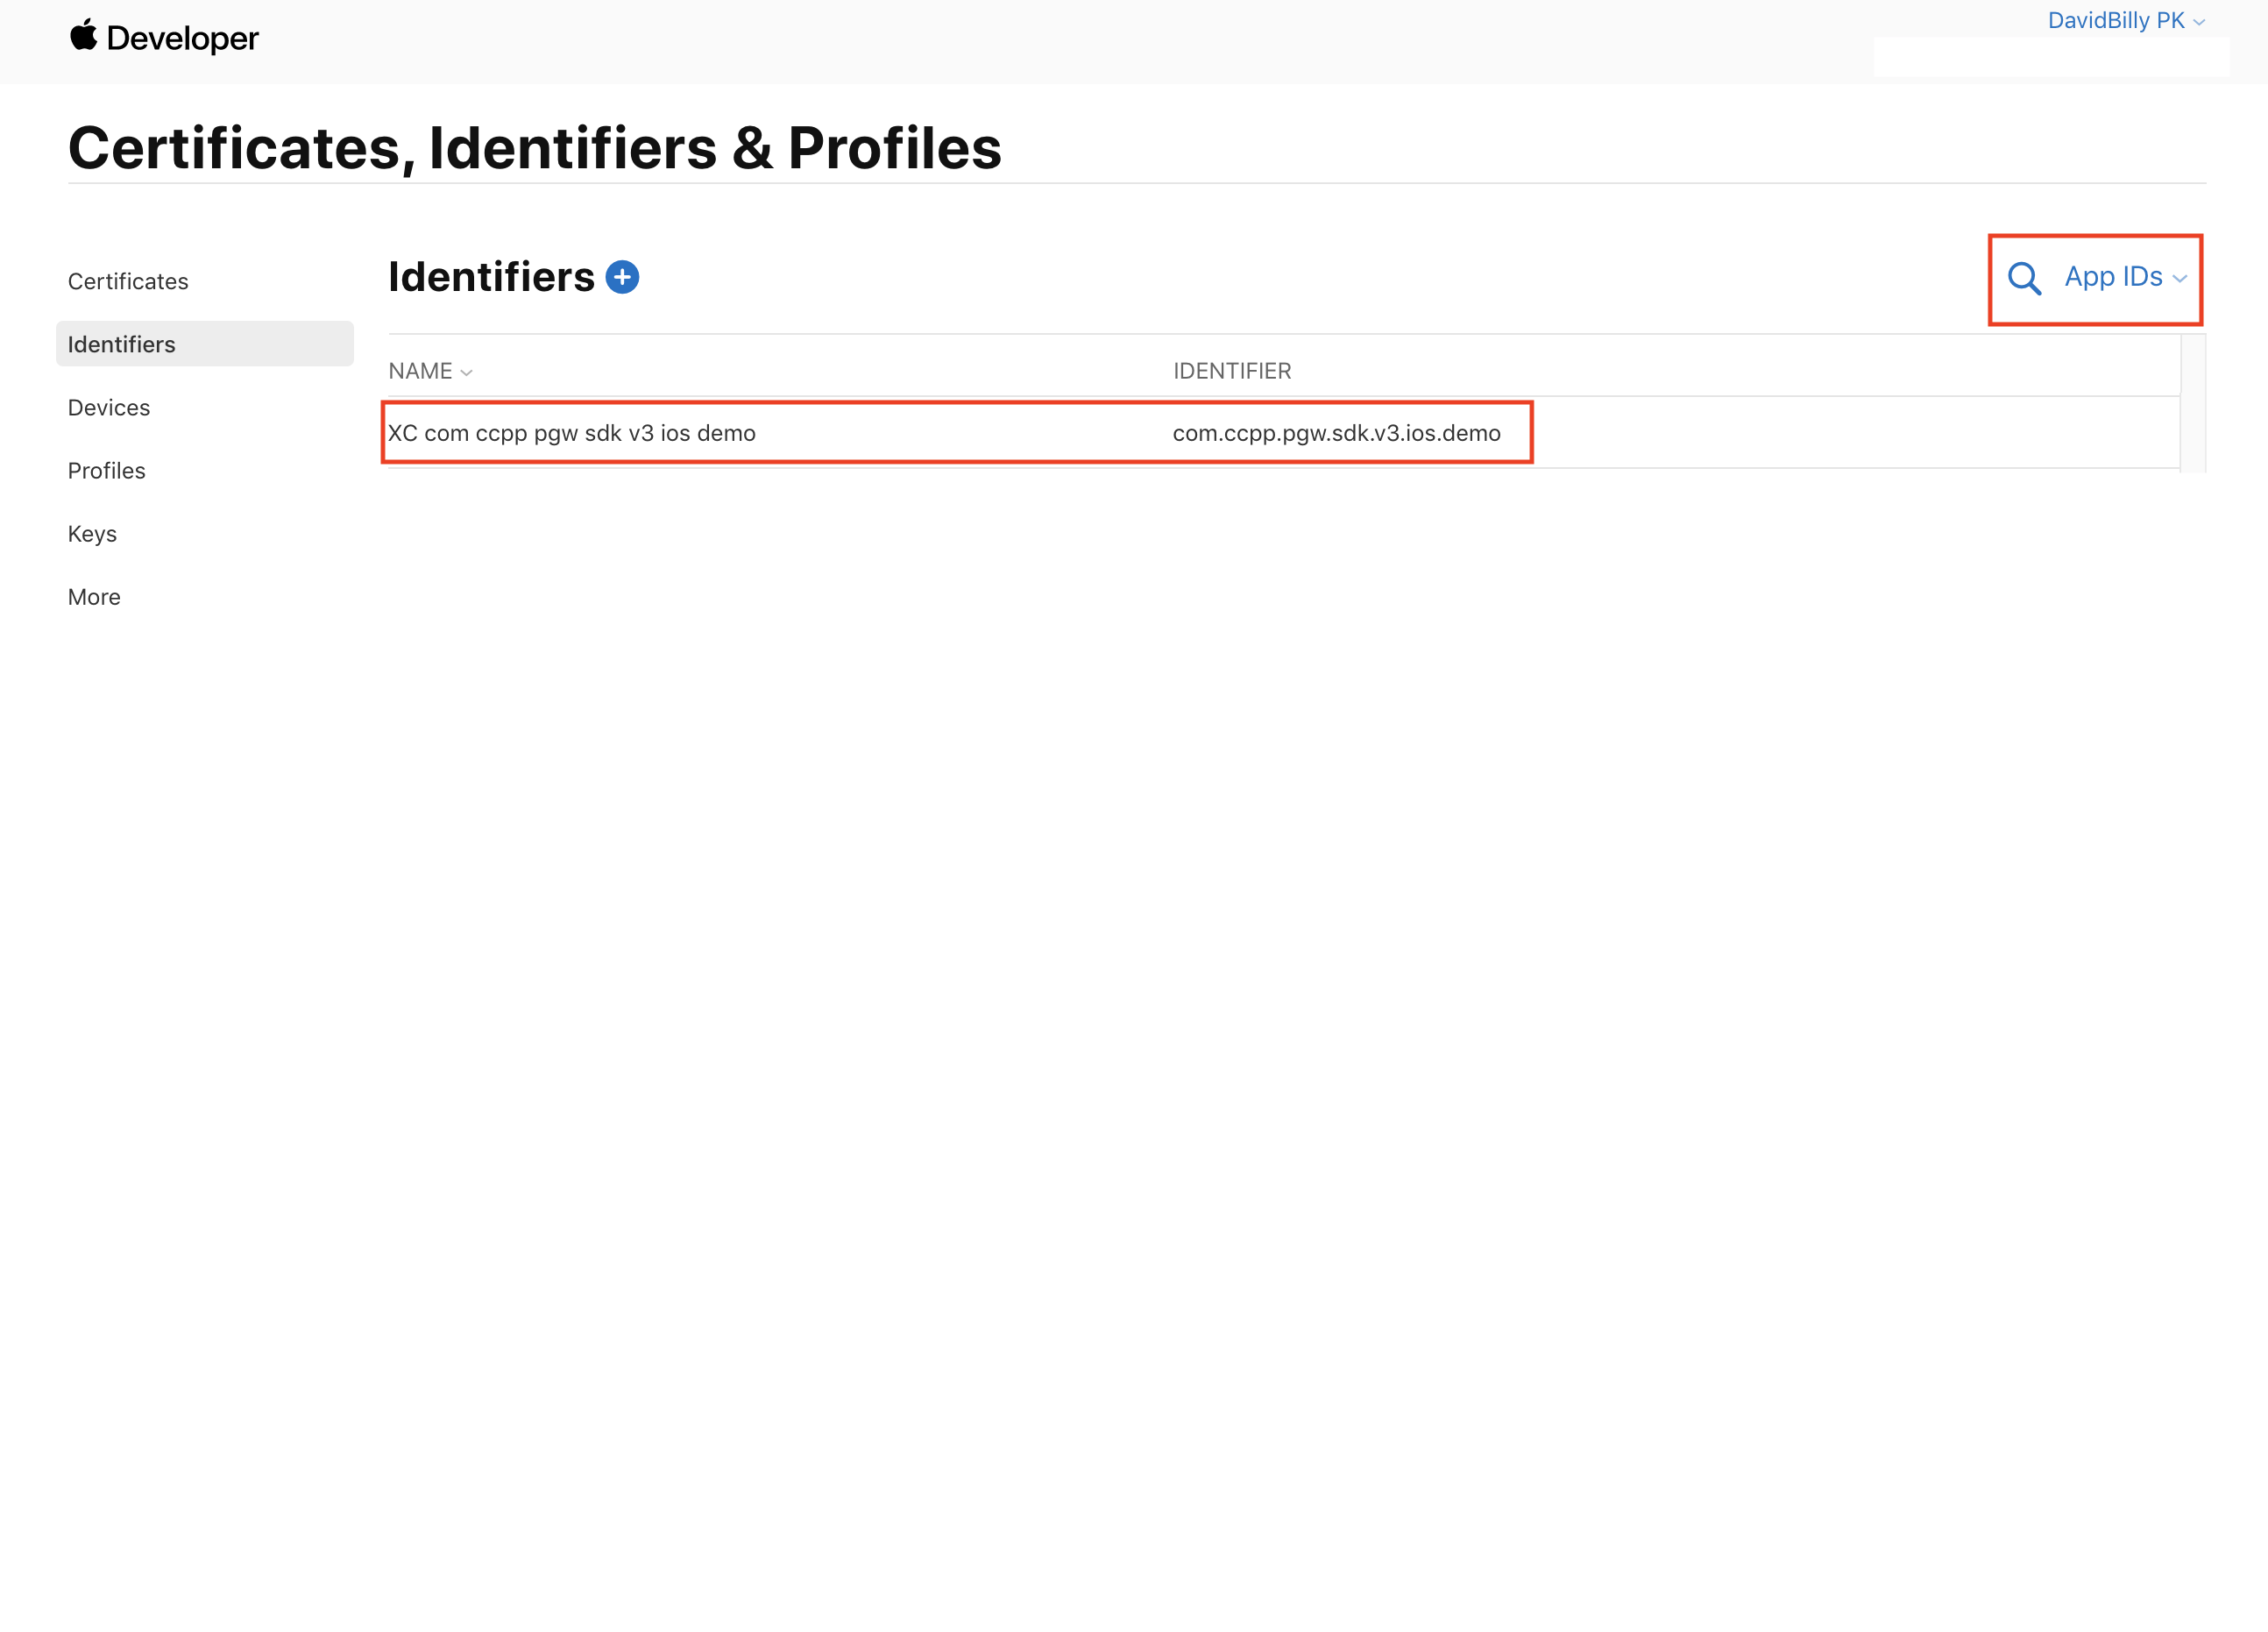
Step 1: Filter by App IDs and select your application.

Step 2: Enable Apple Pay Payment Processing and click on edit.
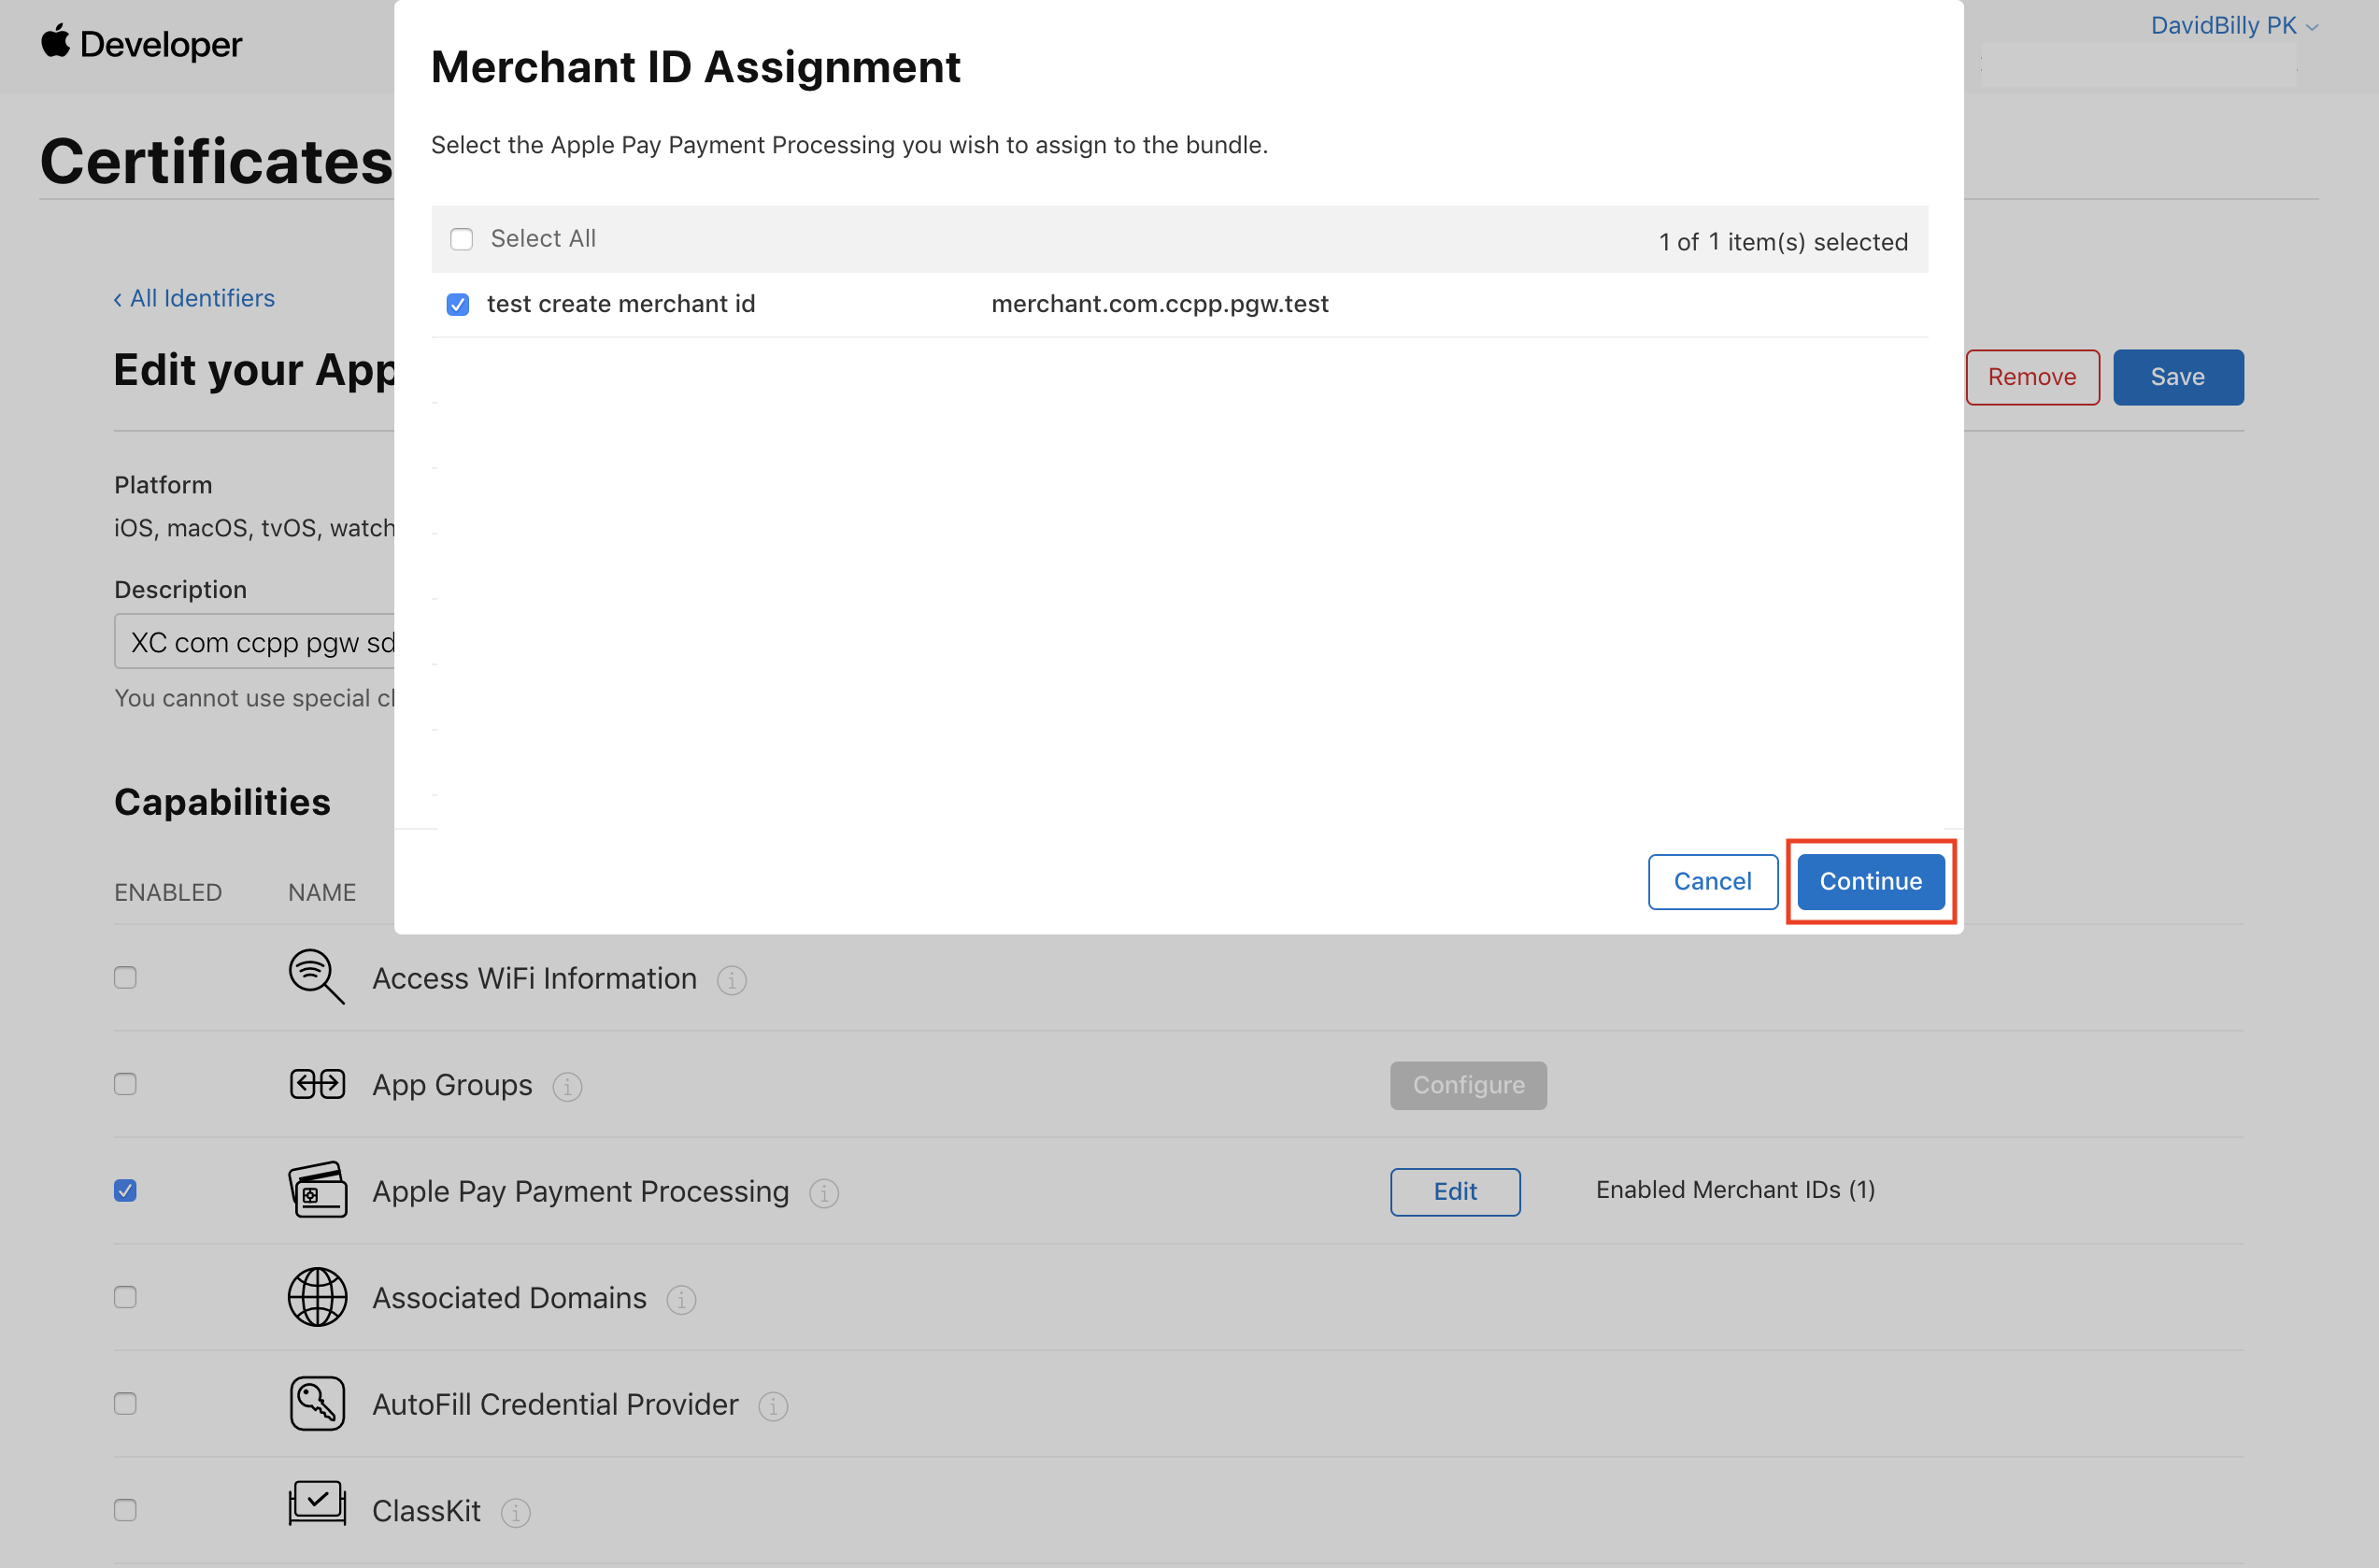
Step 3: Select your Merchant ID and click on continue.
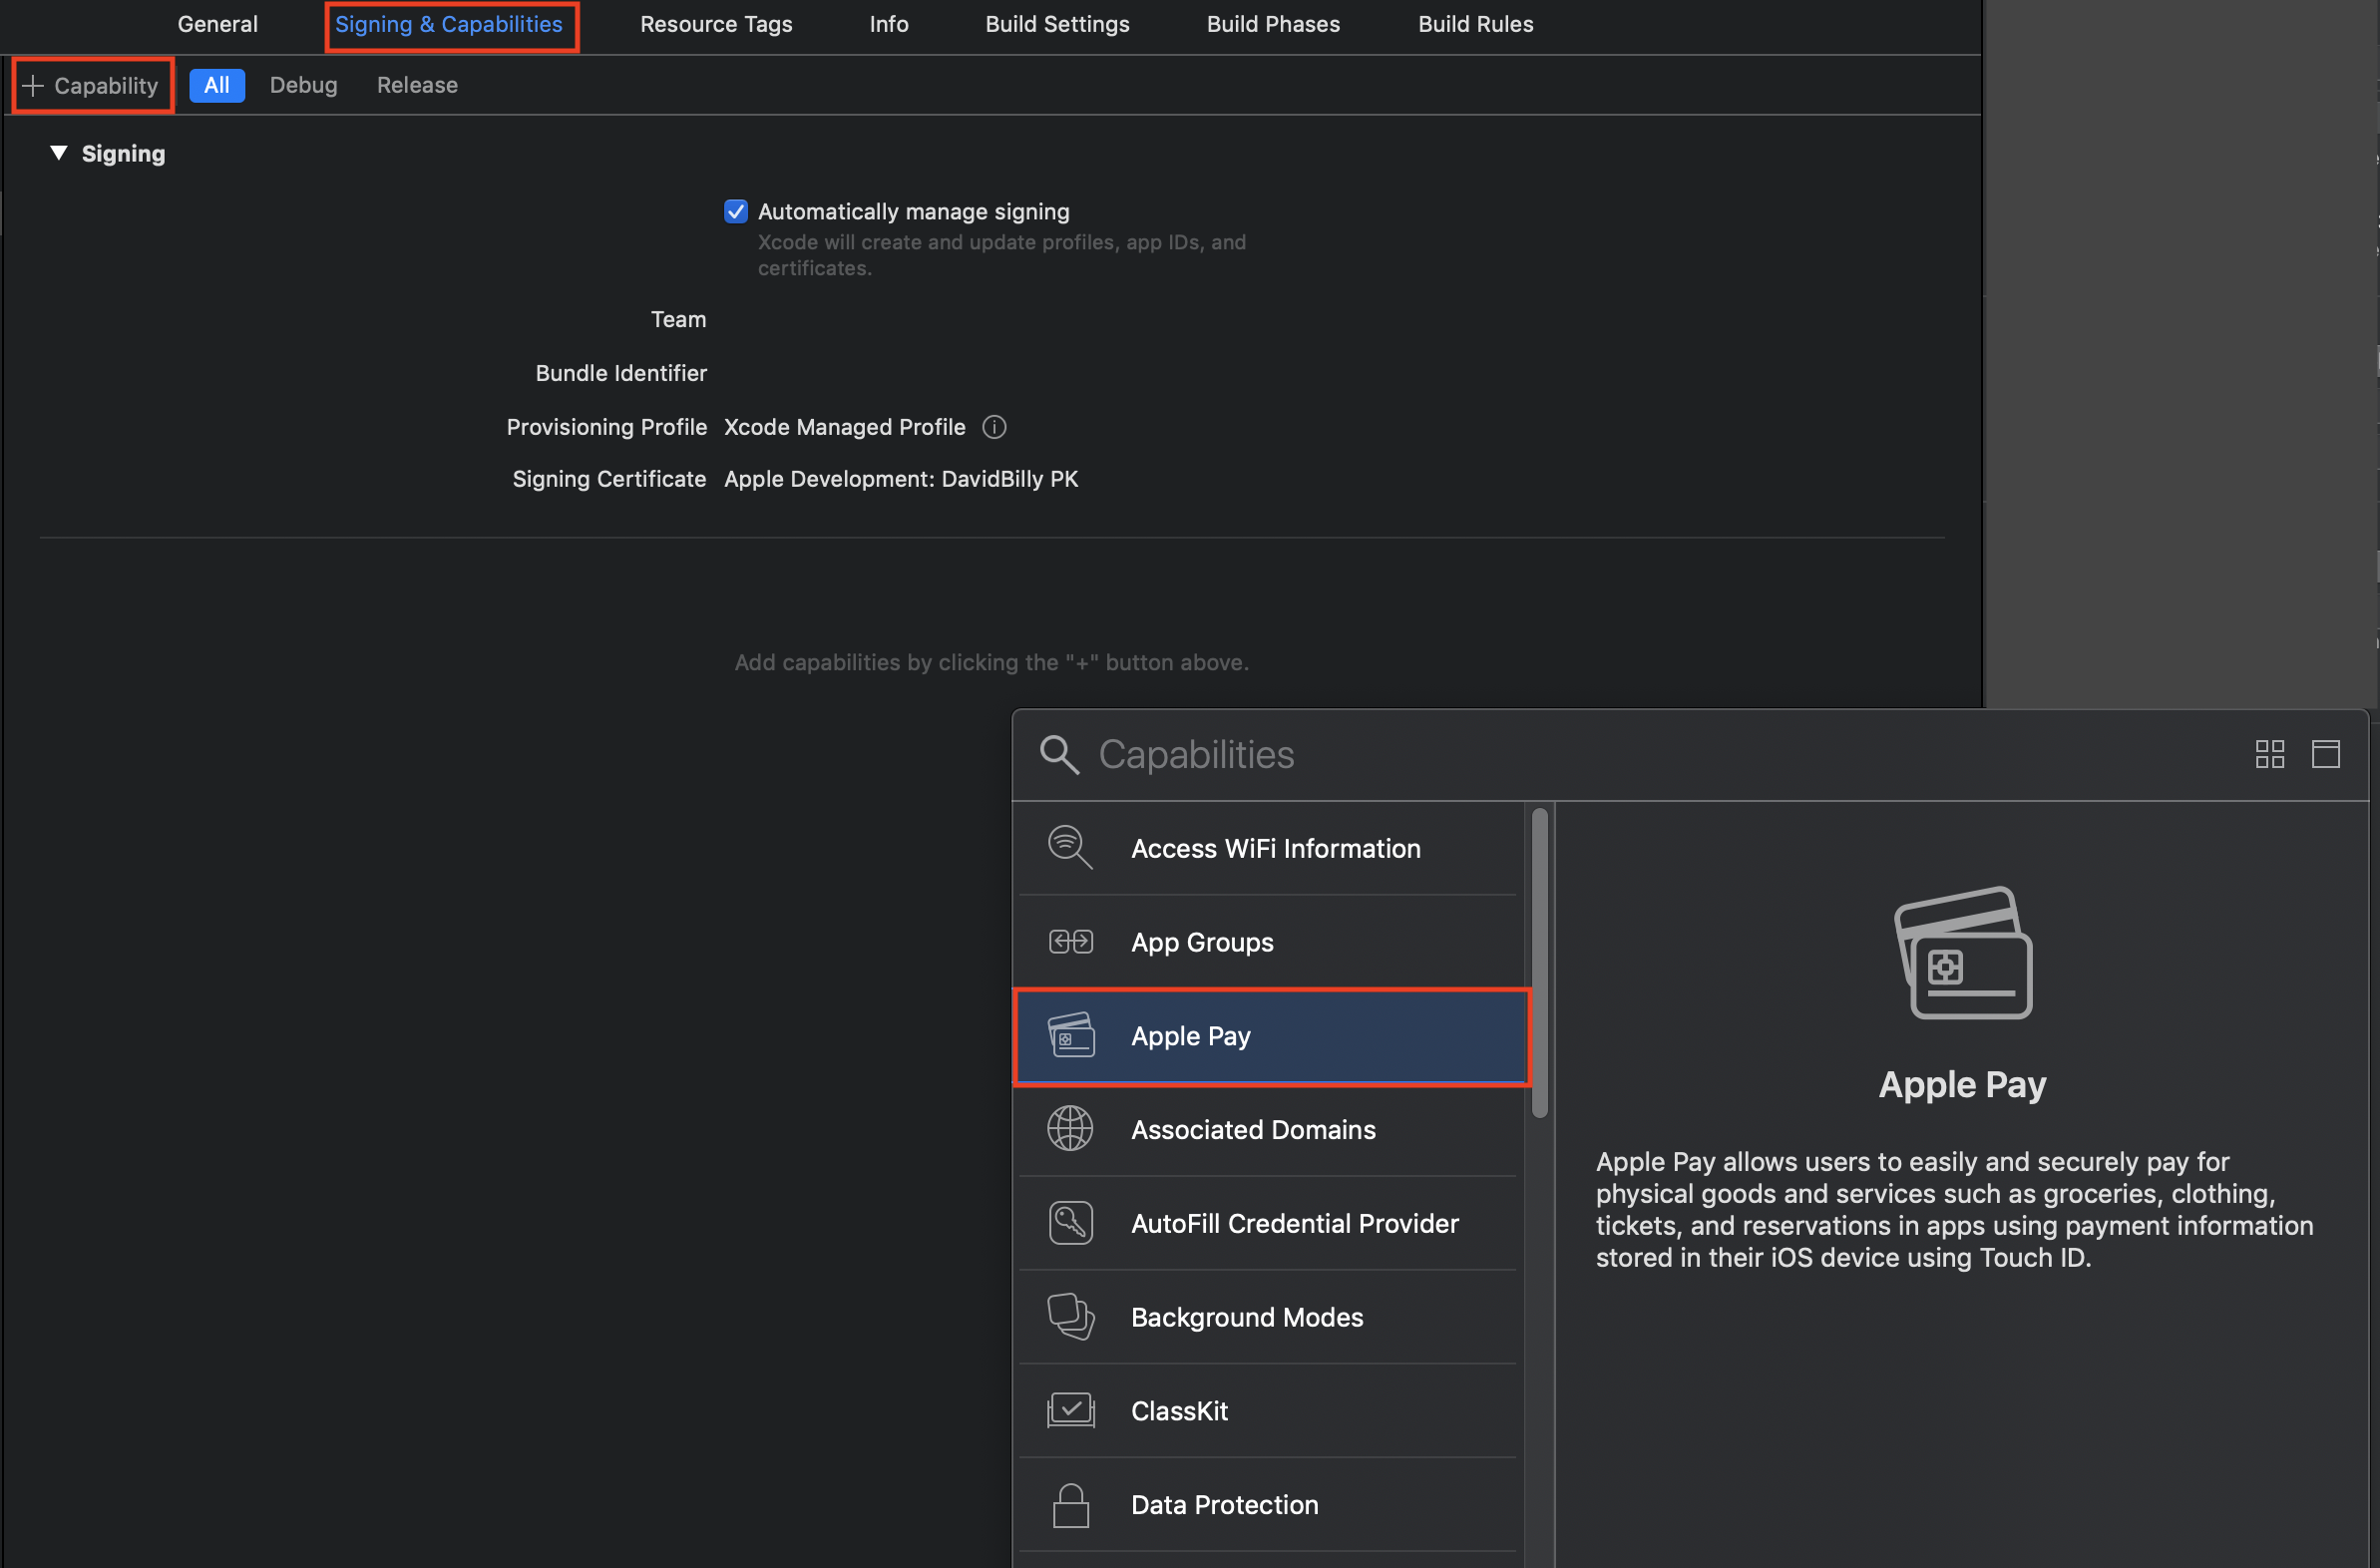
Step 4: At your XCode, go to Signing & Capabilities and add Apple Pay capability.
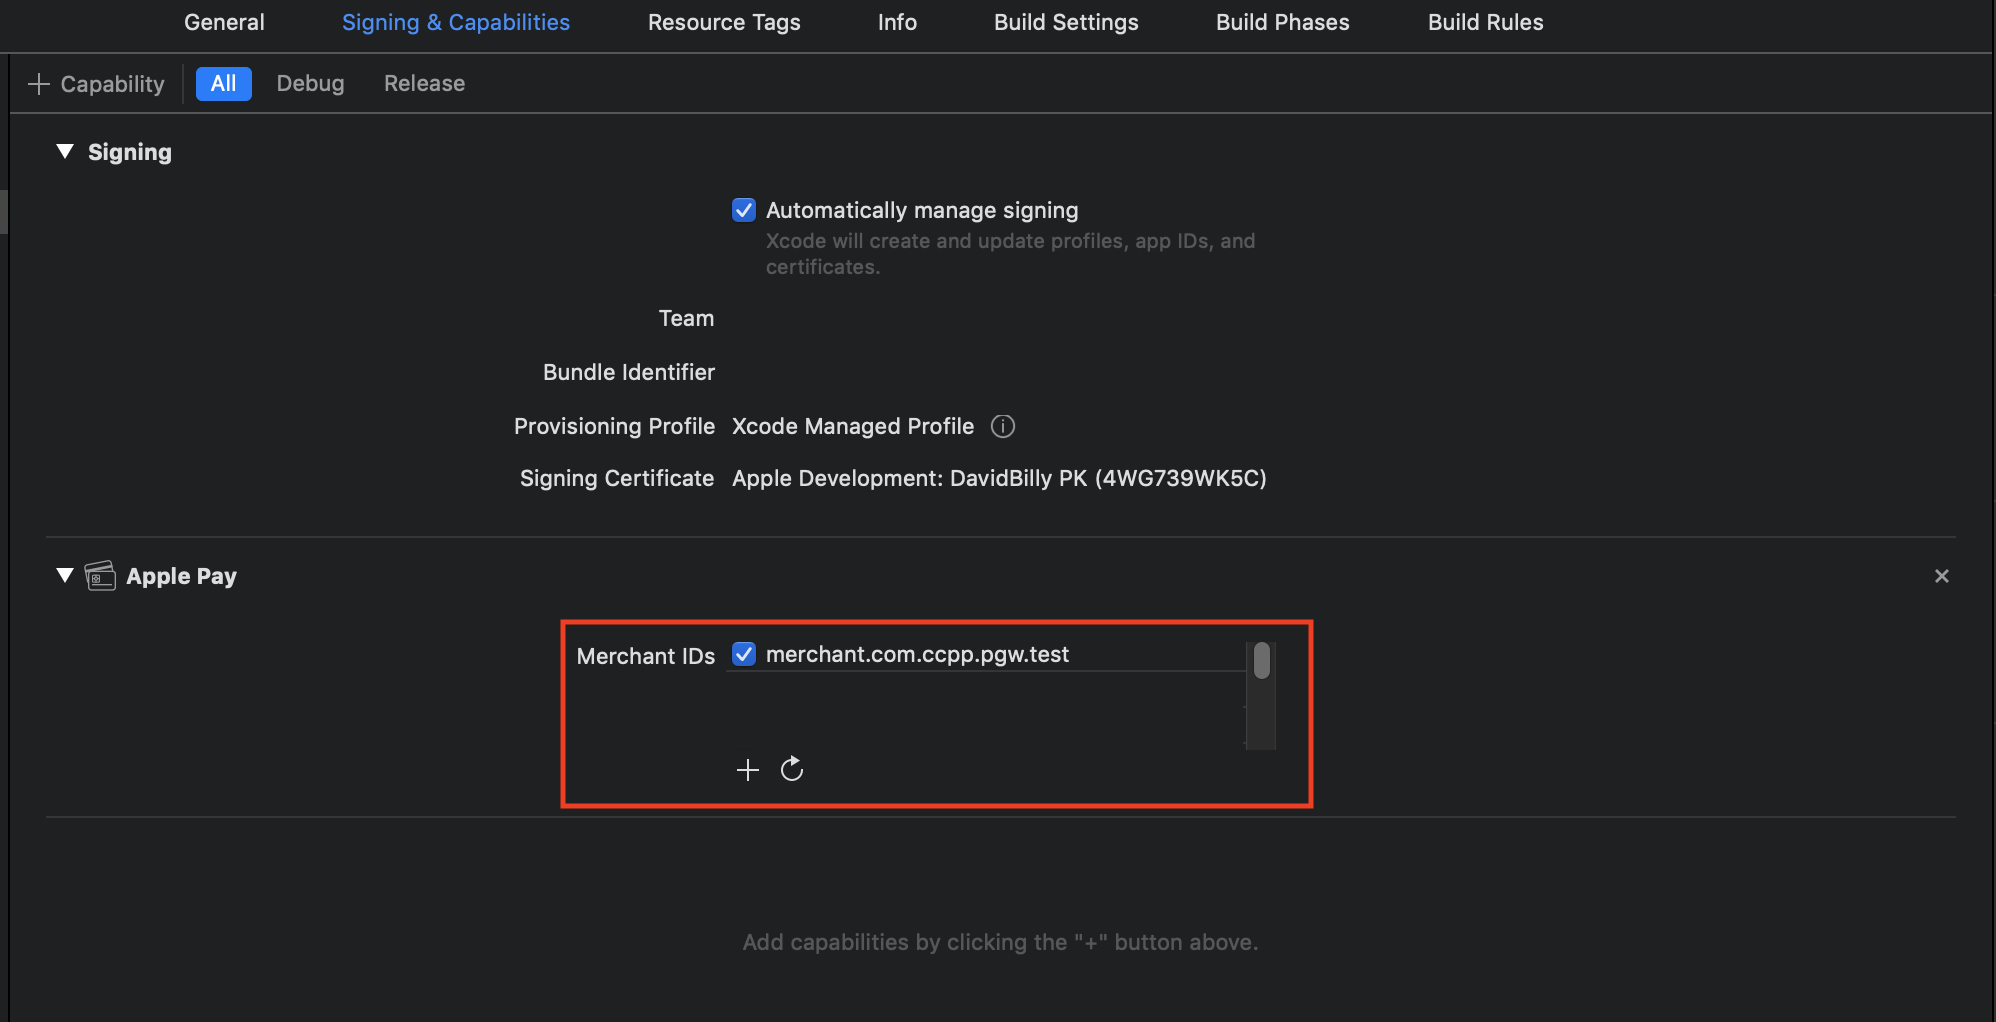
Step 5: Select your Merchant ID and add 2C2P SDK implementation to your application.
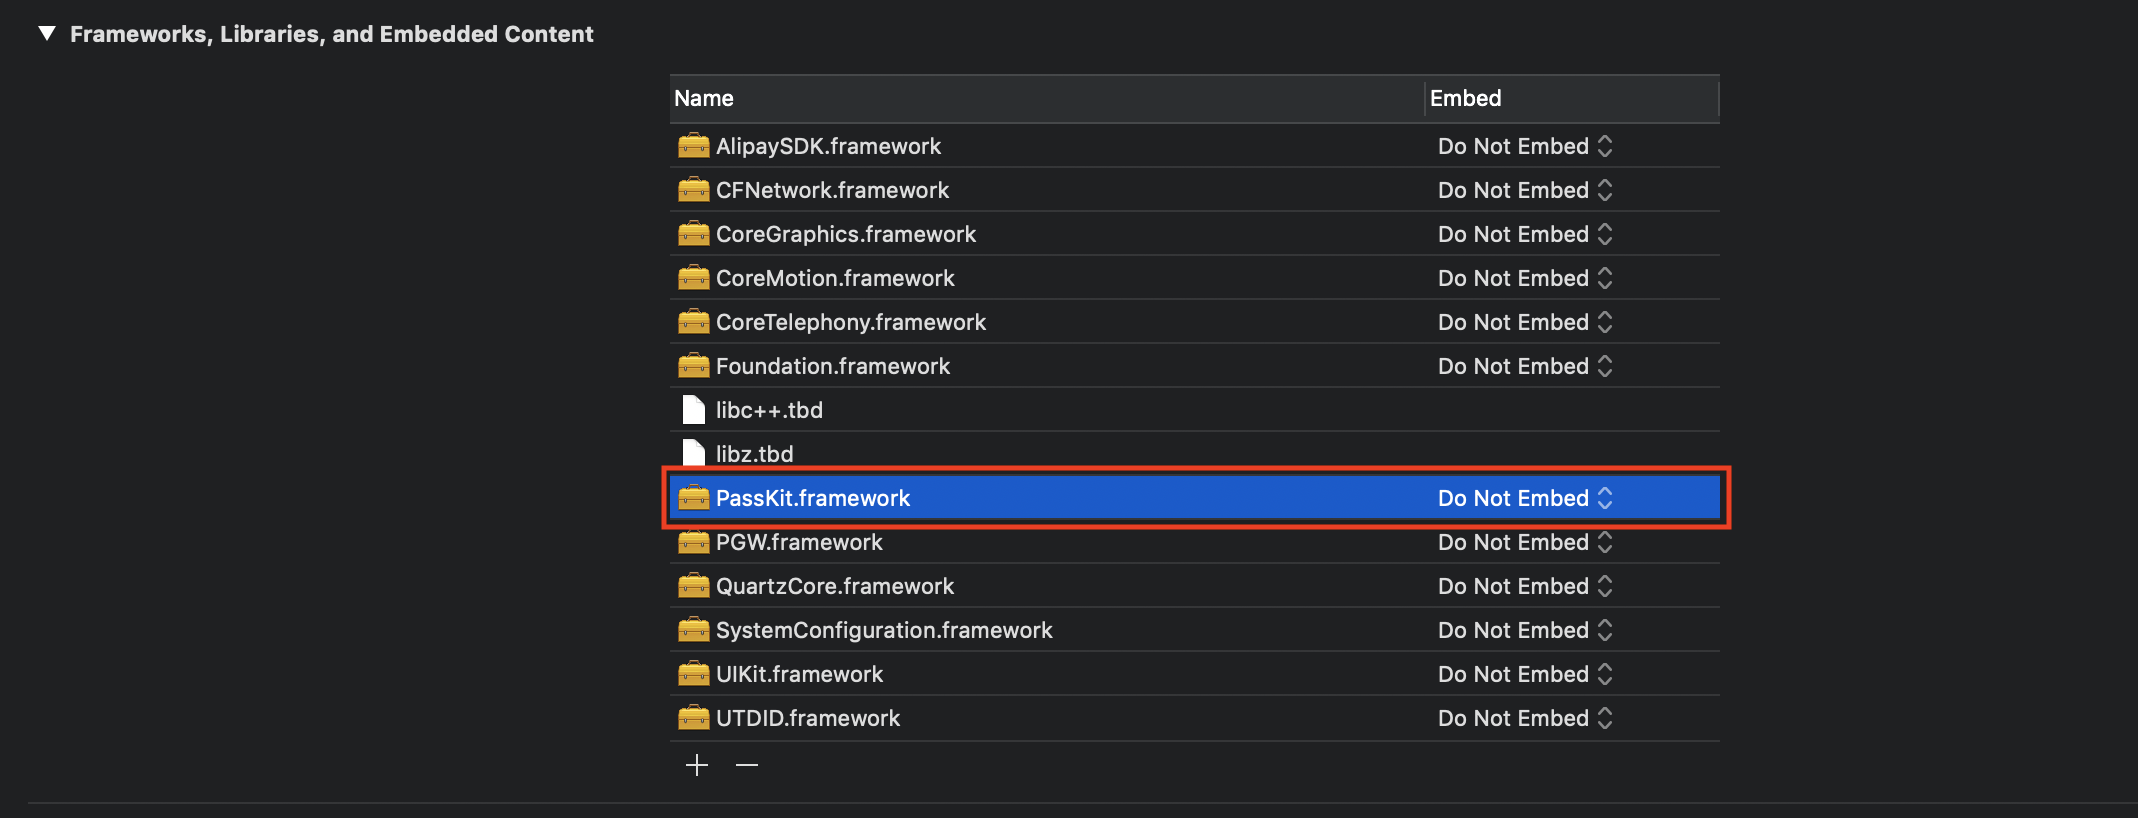
Step 6: Add PassKit.framework into dependency.
To request payment , you need to init the property like below
- (void)payment
{

    //set mandatory fields
    paymentSDK.merchantID = @"JT01";
    paymentSDK.uniqueTransactionCode = @"1234567890";
    paymentSDK.desc = @"production item 1";
    paymentSDK.amount = 10.00;
    paymentSDK.currencyCode = @"840";
    paymentSDK.secretKey = @"123456";
    paymentSDK.paymentUI = YES;

    //mandatory for ApplePay
    paymentSDK.appleMerchantIdentifier = @"merchant.com.ccpp.pgw.web.applepay.sandbox"; //Shoud use your own Apple Merchant Identifier

    [paymentSDK requestWithTarget:self onResponse:^(NSDictionary *response)
    {
        NSLog(@"%@",response);
        NSString *message = @"";
        if([response[@"respCode"] isEqualToString:@"00"])
        {
            message = @"Payment Success";
        }
        else {
            message = response[@"failReason"];
        }

        NSLog(@"Payment status: %@",message);

    } onFail:^(NSError *error) {
        if(error) {
            NSLog(@"%@",error);
        }else {
            NSLog(@"Cancel The Payment From OTP");
        }
    }];
}
func payment() {

    //set mandatory fields
    paymentSDK.merchantID = "JT01"
    paymentSDK.uniqueTransactionCode = "1234567890"
    paymentSDK.desc = "production item 1"
    paymentSDK.amount = 10.00
    paymentSDK.currencyCode = "840"
    paymentSDK.secretKey = "123456"
    paymentSDK.paymentUI = true

    //mandatory for ApplePay
    paymentSDK.appleMerchantIdentifier = "merchant.com.ccpp.pgw.web.applepay.sandbox" //Shoud use your own Apple Merchant Identifier

    paymentSDK.request(withTarget: self, onResponse: { (response) in
        print("response: \(String(describing: response))")
    }) { (error) in
        if error != nil {
            print("error: \(String(describing: error?.localizedDescription))")
        }else{
            print("user cancel payment")
        }
    }
}
Check the full Payment Request example and response at Response Dictionary.